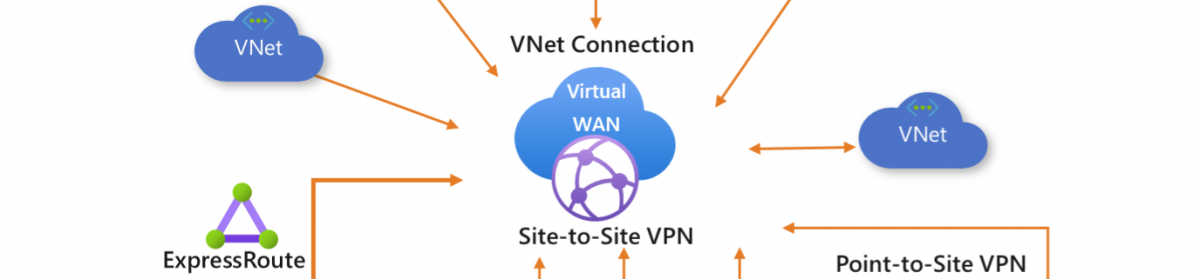
There are multiple ways on how to use a VPN and how to connect and use this. In this blog I use an Azure Virtual WAN Hub with associated security and routing policies configured by Azure Firewall Manager.
When connecting to your Virtual Hub over the IKEv2 protocol, you can use certificate-based authentication or RADIUS authentication. However, when you use the OpenVPN protocol, you can also use Azure Active Directory authentication.
I will use the open VPN with Azure Active Directory authentication. Remember this is only supported on Windows 10 as you will need the Azure VPN client from the microsoft store.

For giving the vpn application the proper permissions, you need to register the application to your Azure AD first.
below is the default URL that can be used to trigger the registration, use the proper rights to create an enterprise App in you Azure AD
Sign in with the proper credentials

Using the wrong account will end up in
AADSTS50020: User account from identity provider ‘live.com’ does not exist in tenant ‘Microsoft’ and cannot access the application ‘4b4′(Azure VPN) in that tenant. The account needs to be added as an external user in the tenant first. Sign out and sign in again with a different Azure Active Directory user account.

When Accepted the you will be redirected to the Azure portal.

In the Azure portal you can go to the Azure active directory and
Enterprise applications | All applications and search for Azure VPN

Now that the basics are in place, we can configure our Site to Site VPN profile the following information is needed.
Go to your Virtual Wan and select the user VPN configuration


Create User VPN ##### I noticed during the writing of this blog post the screens may differ as the portal changed the layout#######
- Configuration name – Enter the name you want to call your User VPN Configuration.
- Tunnel type – Select OpenVPN.
- Authentication method – Select Azure Active Directory.
- Audience – Type in the Application ID of the Azure VPN Enterprise Application registered in your Azure AD tenant.
- Issuer –
https://sts.windows.net/tenantID/ - AAD Tenant –
https://login.microsoftonline.com/TenantID

Select open VPN
go to the Azure Active Directory <> properties and grab the Tenant ID


Set the switch to yes and new fields will open.

- Audience – Type in the Application ID of the Azure VPN Enterprise Application registered in your Azure AD tenant.
- Issuer –
https://sts.windows.net/3078684f/## remember the / this must be at the end - AAD Tenant –
https://login.microsoftonline.com/3078684f
#the number is your tenant ID

Now that the VPN user profile is created we can configure the HUB

Now that the user vpn profile is created we can create the P2S VPN. Select your hub

Select the user VPN point to site VPN select create

Creating a VPN gateway you need to select the just created User profile.

Select a proper IP subnet and if needed a DNS server for the workload into that network
Updating a hub can take 30 minutes or more.

Download User VPN profile as we need this on the Windows 10 client later.
Use the VPN profile to configure your clients.
- On the page for your Virtual WAN, click User VPN configurations.
- At the top of the page, click Download user VPN config.
- Once the file has finished creating, you can click the link to download it.
- Use the profile file to configure the VPN clients.


To download the Azure VPN client on your windows 10 test device.
Use this link to download the Azure VPN Client.


Open the VPN Client you can add a new VPN or import a Connection


For Importing the Connection we need the just downloaded zip file and extract this in the AzureVPN folder there is a XML that holds the vpn configuration.


If any thing goes wron with the import it is 99% your pbk file,

go to the following folder and delete the files – this will probably also remove your other vpn connections it you had any.
%userprofile%\AppData\Roaming\Microsoft\Network\Connections\Pbk\rasphone.pbk
C:\Users\admin\AppData\Local\Packages\Microsoft.AzureVpn_8wekyb3d8bbwe\LocalState


Now that the Import worked and you are ready to connect to the VPN in Azure.

Use your Azure AD credentials or your FIDO2 key


Now we are fully connected to the Secure Virtual WAN in Azure

It can take some time to see your connection in the portal

Showing the above it all is easy to setup this but I already see the questions yes but I need to do this on 5000 Windows 10 devices.
Microsoft Endpoint Management is your best friend.
Deploy VPN with Microsoft Endpoint Management
We create a Custom Template and do not select the VPN option as this is not for uploading the XML


In our Custom settings we add the Following settings
- Name: Enter a name for the configuration.
- Description: Optional description.
- OMA-URI: ./User/Vendor/MSFT/VPNv2/demo01_hub-weu/azurevpnconfig.xml (this information can be found in the azurevpnconfig.xml file in the tag Name).
- Data type: String (XML file).

Now that this is done we can create some assign ments and test this on the pilot group

As you can see there are a few steps involved and are linked together

Follow Me on Twitter @ClusterMVP
Follow My blog https://robertsmit.wordpress.com
Linkedin Profile Robert Smit MVP Linkedin profile
Google : Robert Smit MVP profile


