Recently the menu structure in Azure is changed into a collapsed and expanded menu, Don’t know who thought it was the best option to have all the blades in collapsed mode. one word #annoying for me
Collapsing menus, also known as accordion menus, are a popular design choice in many web applications, including Microsoft Azure. They allow for a clean and organized interface, especially in areas where there is a need to display a large amount of content or numerous options. In the context of Microsoft Azure, collapsing menus can be seen throughout the Azure portal. These menus help in navigating through the vast array of services, resources, and settings that Azure has to offer.
When you log into the Azure portal, you’re presented with a sidebar on the left side of the screen. This sidebar contains a list of menu items representing different Azure services like App Services, Storage Accounts, SQL Databases, and more. Each of these menu items can be expanded or collapsed by clicking on them. When a menu item is collapsed, you’ll only see the icon and the name of the service. However, when you expand a menu item, it reveals a set of sub-menu items. These sub-menu items provide quick access to various features and settings related to that particular service.
I know the User experience can vary greatly, and what works well for one person might not work as well for another.
Luckely there is an easy way to fix this, in the portal settings.
Go to the startup views and change the collapsed to expanded
Don’t forget to Apply the settings
The beauty of these collapsing menus is that they allow you to have a multitude of options readily available, without overwhelming the interface. You can easily navigate to the service you need, expand its menu, and dive into the specific feature or setting you’re interested in.
With the Expanded setting you will see the full blade with all the items
collapsing menus in Azure provide a streamlined and efficient way to navigate the platform, making it easier for users to manage and configure their Azure resources. They are a testament to Azure’s user-friendly design, catering to both novice users and seasoned professionals alike.
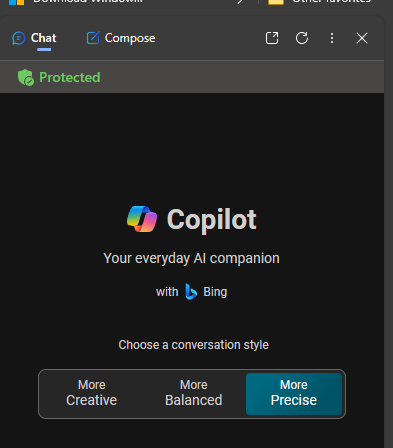
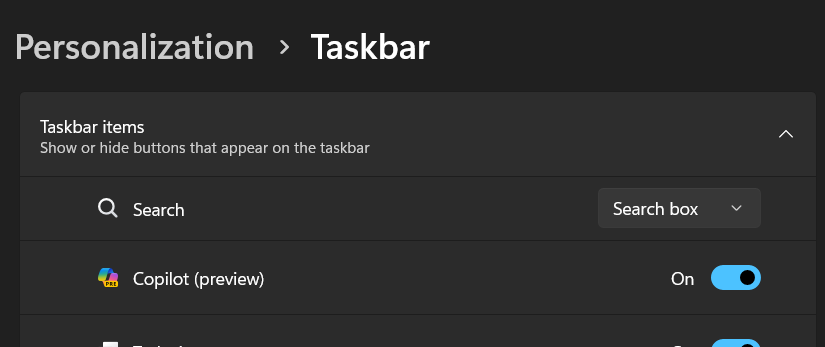
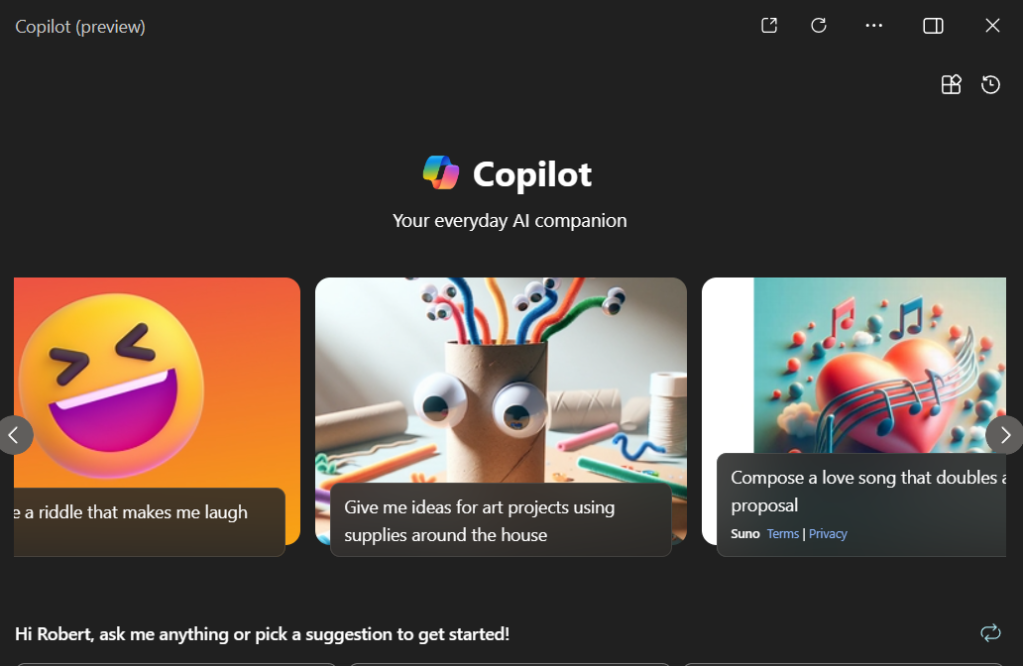
Already for some time I was a happy user of Copilot. I used some restrictions bypass as Copilot was not enabled for some regions. Suddely My copilot shortcut opens edge What and yes there is copilot but annoying
What does Copilot say ?
Region restrictions for Copilot can be a significant hurdle for users in unsupported countries. However, there are several steps that users can take to potentially overcome these limitations. Firstly, it’s important to ensure that you’re not connected to a VPN that might be altering your apparent location, as this can affect access to region-restricted services. Additionally, checking and possibly reconfiguring your network settings could resolve the issue, as misconfigured settings can prevent Copilot access. For those in regions where Copilot has not been officially released, changing the DNS server to a more widely accepted one like Google’s DNS may provide a solution. It’s also worth noting that Microsoft plans to expand the availability of Copilot, which could eventually make it accessible in more regions without the need for workarounds. While these methods are not guaranteed fixes, they offer a starting point for users looking to access Copilot in restricted areas. Remember to stay updated with official announcements from Microsoft for the latest information on region support and availability.
So it seems my windows build (insiders build) was set to the emea region netherlands. on every reboot this key is set. delete it and a reboot it is there again.
IsEnabledForGeographicRegionFailed
If your copilot button opens the edge browser, you must set copilot eligibility to 1. To do this, press Windows + R, then type “regedit”, then go to:
and here you open “IsUserEligible”. and set the value to “1” instead of “0”.
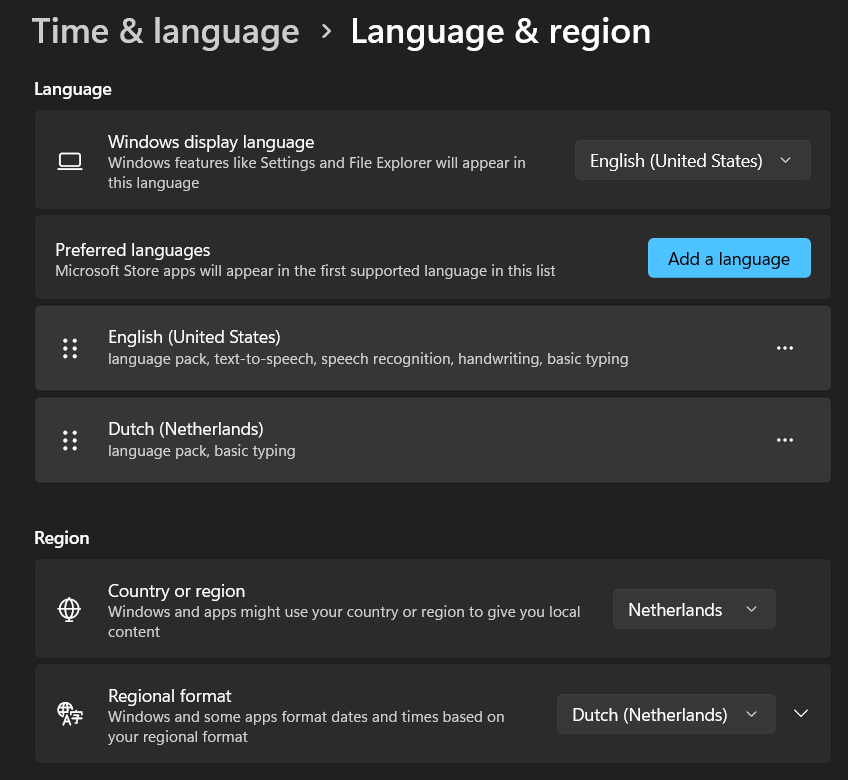
After that, don’t forget to change your pc region in settings in :
Time and language<Language and region and put United states.
That sounds easy but I noticed it does not always work.
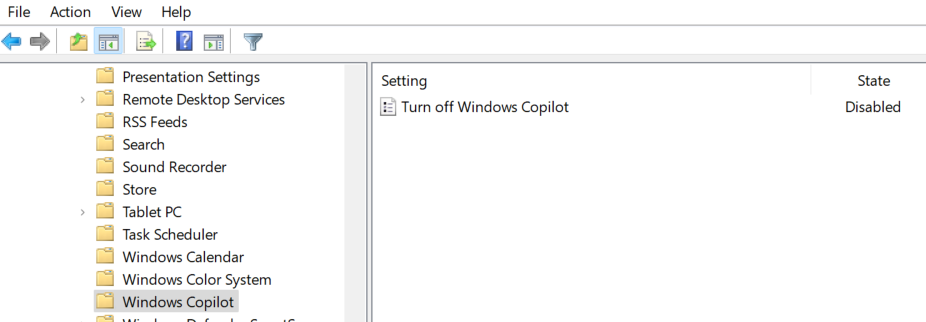
force enable Copilot with a GPO is also an option go to gpedit.msc
User settings <> windows components
This is also not always fixing the issue.
Make sure you have the folowing register keys.
Press Win + R and type regedit, then go to HKEY_CURRENT_USER\Software\Policies\Microsoft\Windows\WindowsCopilot
If the WindowsCopilot key is not there creat this first.
and create a new DWORD x32 called TurnOffWindowsCopilot, make sure the Value data = 0, do the same on HKEY_LOCAL_MACHINE\Software\Policies\Microsoft\Windows\WindowsCopilot. make sure the Value data = 0
next :
Computer\HKEY_CURRENT_USER\Software\Microsoft\Windows\CurrentVersion\Explorer\Advanced or copy and paste it on the address bar, then change ShowCopilotButton Value Data to 1.
Any of these settings a restart of your computer is needed.
After all this Copilot should work on your windows 11 device
Windows Server 2025 represents the next evolution of Microsoft’s server operating system, aiming to enhance security, performance, scalability, and IT infrastructure management. This blog post will provide a detailed comparison of Windows Server 2025 and its predecessor, Windows Server 2022.
Windows Server 2022: A Recap
Windows Server 2022 is built on the strong foundation of Windows Server 2019 and brings many innovations on three key themes: security, Azure hybrid integration and management, and application platform.
Here are some of the key features of Windows Server 2022:
Azure Edition: Windows Server 2022 Datacenter: Azure Edition helps you use the benefits of cloud to keep your VMs up to date while minimizing downtime.
Hotpatching: This feature is available for Windows Server 2022 Datacenter: Azure Edition.
SMB over QUIC: This feature is available for Windows Server 2022 Datacenter: Azure Edition.
Software-defined Networking: This feature is available for Windows Server 2022 Datacenter.
Storage Replica: This feature is available for all editions of Windows Server 2022.
Windows Server 2025: What’s New?
Windows Server 2025 is driven by your feedback and your desire to embrace a hybrid, adaptive cloud. Here are a few areas Microsoft is investing in:
Windows Server Hotpatching for everyone: This feature allows for seamless updates to your server without the need for a reboot.
Next Generation Active Directory and SMB: These features aim to enhance the security and efficiency of your network infrastructure.
Mission Critical Data & Storage: This feature focuses on improving the reliability and performance of your data storage.
Hyper-V & AI: This feature aims to integrate artificial intelligence capabilities into your virtual machines.
Comparison of Windows Server 2022 and 2025
Here’s a comparison of the features available in Windows Server 2022 and 2025:
Feature
Windows Server 2022
Windows Server 2025
Azure Edition
Yes
Yes
Hotpatching
Datacenter: Azure Edition
All editions
SMB over QUIC
Datacenter: Azure Edition
All editions
Software-defined Networking
Datacenter
All editions
Storage Replica
All editions
All editions
In conclusion, Windows Server 2025 builds upon the strong foundation of Windows Server 2022 and introduces several new features and enhancements. By understanding the differences between these two versions, IT professionals can make informed decisions about upgrading their server infrastructure.
Stay tuned for more detailed posts about each of these features in the coming weeks!
Azure Firewall, a managed, cloud-based network security service, is an essential component of Azure’s security offerings. It comes in three different versions – Basic, Standard, and Premium – each designed to cater to a wide range of customer use cases and preferences. This blog post will provide a comprehensive comparison of these versions, discuss best practices for their use, and answer the top 5 most asked questions about Azure Firewall. We will also delve into its application in hub-spoke and Azure Virtual WAN with Secure Hub architectures.
Azure Firewall Versions: Basic, Standard, and Premium
Azure Firewall Basic
Azure Firewall Basic is recommended for SMB customers with throughput needs of 250 Mbps. It’s a cost-effective solution for businesses that require fundamental network protection.
Azure Firewall Standard
Azure Firewall Standard is recommended for customers looking for Layer 3–Layer 7 firewall and needs autoscaling to handle peak traffic periods of up to 30 Gbps. It supports enterprise features like threat intelligence, DNS proxy, custom DNS, and web categories.
Azure Firewall Premium
Azure Firewall Premium is recommended to secure highly sensitive applications (such as payment processing). It supports advanced threat protection capabilities like malware and TLS inspection. Azure Firewall Premium uses advanced hardware and offers a higher-performing underlying engine, best for heavier workloads and higher traffic volumes.
Best Practices for Azure Firewall
To maximize the performance of your Azure Firewall, it’s important to follow best practices. Here are some recommendations:
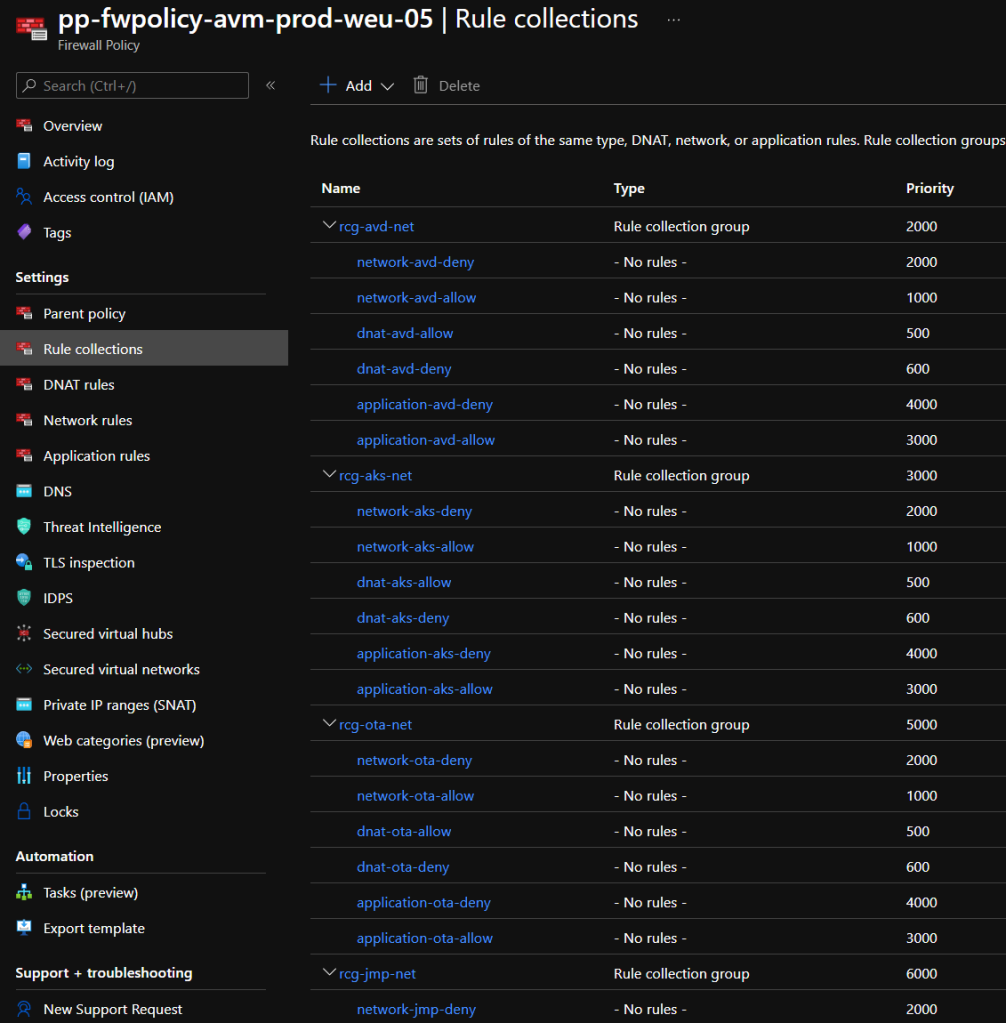
Optimize rule configuration and processing: Organize rules using firewall policy into Rule Collection Groups and Rule Collections, prioritizing them based on their use frequency.
Use or migrate to Azure Firewall Premium: Azure Firewall Premium offers a higher-performing underlying engine and includes built-in accelerated networking software.
Add multiple public IP addresses to the firewall to prevent SNAT port exhaustion: Consider adding multiple public IP addresses (PIPs) to your firewall.
Top 5 Most Asked Questions About Azure Firewall
What is Azure Firewall? Azure Firewall is a managed, cloud-based network security service that protects your Azure Virtual Network resources.
What capabilities are supported in Azure Firewall? Azure Firewall supports features like threat intelligence, DNS proxy, custom DNS, web categories, and more.
What is the typical deployment model for Azure Firewall? Azure Firewall is typically deployed on a central virtual network and peers with other virtual networks in a hub-and-spoke model.
How can I install the Azure Firewall? You can set up Azure Firewall by using the Azure portal, PowerShell, REST API, or by using templates.
Does Azure Firewall support inbound traffic filtering? Yes, Azure Firewall supports both inbound and outbound filtering.
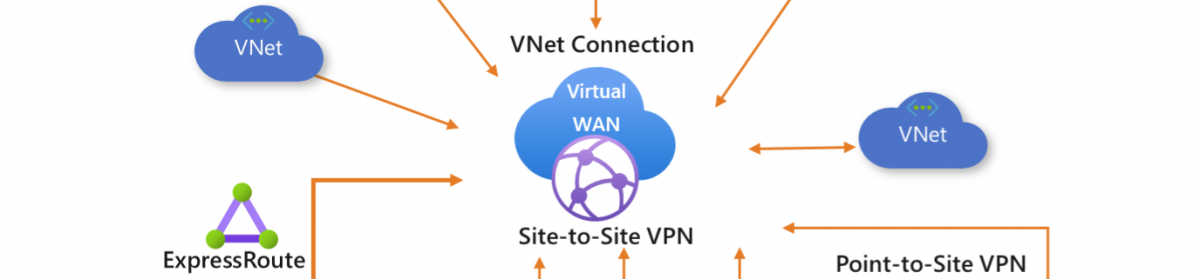
Azure Firewall in Hub-Spoke and Azure Virtual WAN with Secure Hub
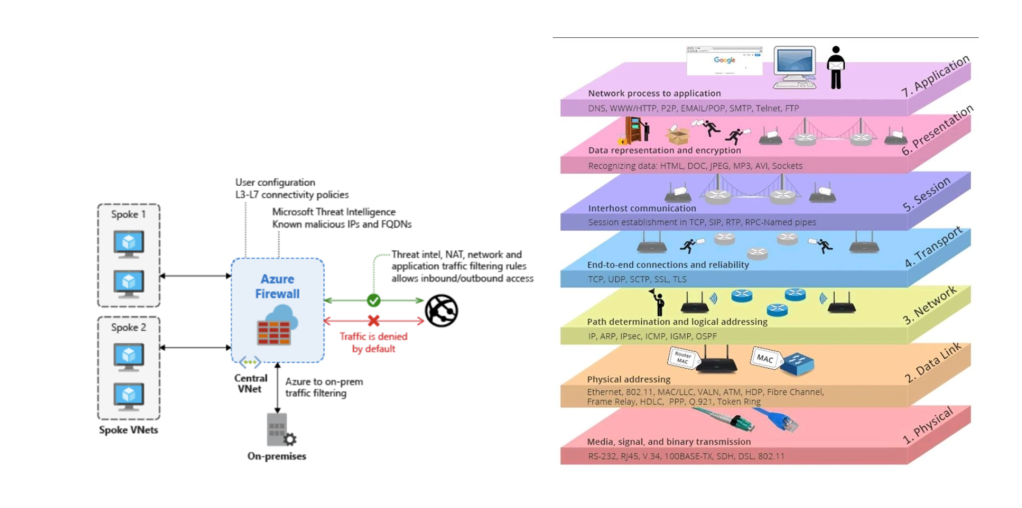
Azure Firewall plays a crucial role in the hub-spoke network architecture pattern in Azure. The hub is a virtual network (VNet) in Azure that acts as a central point of connectivity to your on-premises network. The spokes are VNets that peer with the hub, and can be used to isolate workloads. Azure Firewall secures and inspects network traffic, but it also routes traffic between VNets.
A secured hub is an Azure Virtual WAN Hub with associated security and routing policies configured by Azure Firewall Manager. Use secured virtual hubs to easily create hub-and-spoke and transitive architectures with native security services for traffic governance and protection.
Azure Firewall Features Comparison
Here’s a comparison of the features available in each version of Azure Firewall:
Feature
Basic
Standard
Premium
Stateful firewall (Layer 3/Layer 4)
Yes
Yes
Yes
Application FQDN filtering
Yes
Yes
Yes
Network traffic filtering rules
Yes
Yes
Yes
Outbound SNAT support
Yes
Yes
Yes
Threat intelligence-based filtering
No
Yes
Yes
Web categories
No
Yes
Yes
Intrusion Detection and Prevention System (IDPS)
No
No
Yes
TLS Inspection
No
No
Yes
URL Filtering
No
No
Yes
In conclusion, Azure Firewall is a robust and versatile security service that offers different versions to cater to various needs. By following best practices and understanding its application in different architectures, businesses can effectively secure their Azure resources.
Microsoft’s newest iteration, Windows Server 2025, signifies a major advancement in server technology. This release is brimming with novel features and improvements, specifically designed to enhance performance in virtual settings like Hyper-V. A notable inclusion is the extension of hotpatching capabilities to servers outside of Azure, a pioneering step aimed at minimizing downtime and optimizing server maintenance. Our exploration will center on the installation experience on Hyper-V, the uncomplicated onboarding process for Azure Arc, and the server OS patching using the Azure Update Manager.
We are excited to unveil the official name of the forthcoming release of Windows Server: Windows Server 2025. There are improvements in several areas:
Universal Windows Server Hotpatching
Next-Generation Active Directory and SMB
Mission-Critical Data & Storage
Hyper-V & AI
And much more…
There is a preview Build that you can use in Hyper-V or vmware. Get the ISO or VHDX from the insiders portal Join the Windows Server Insider Program here –Get started
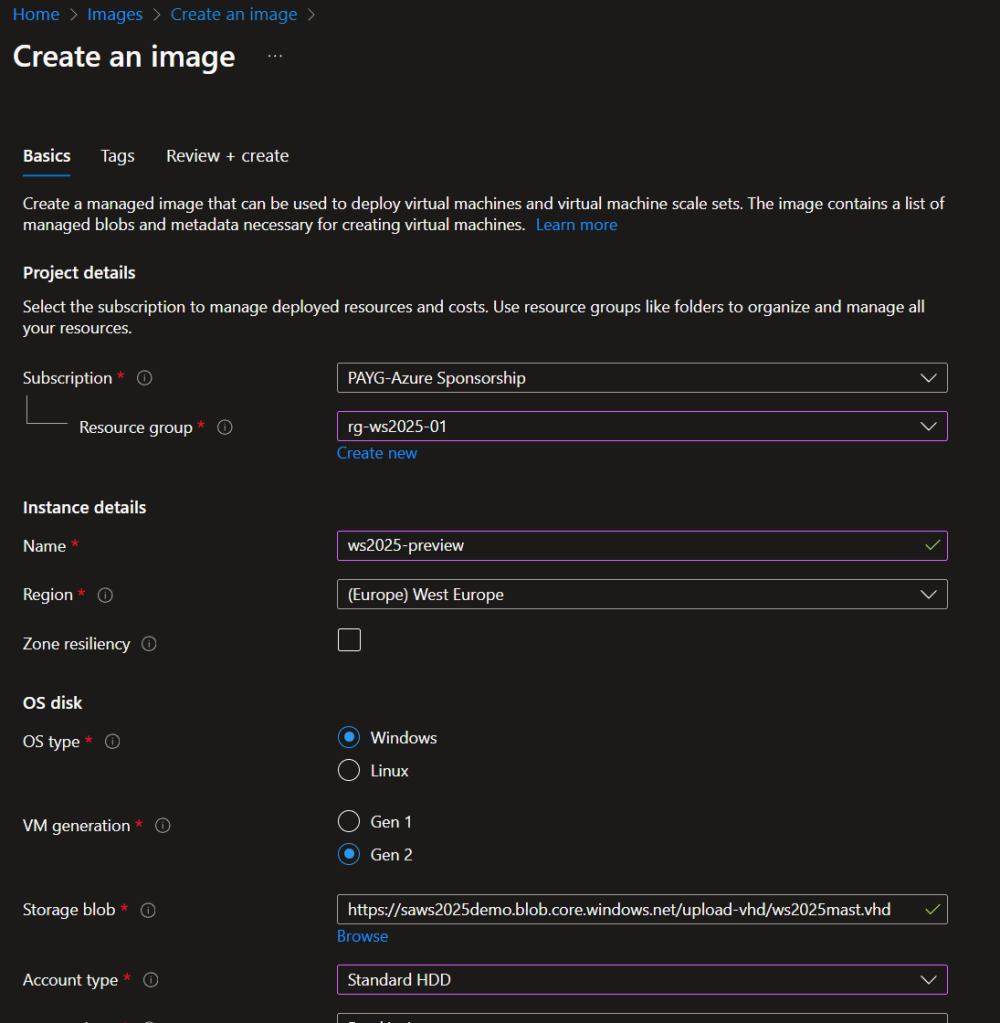
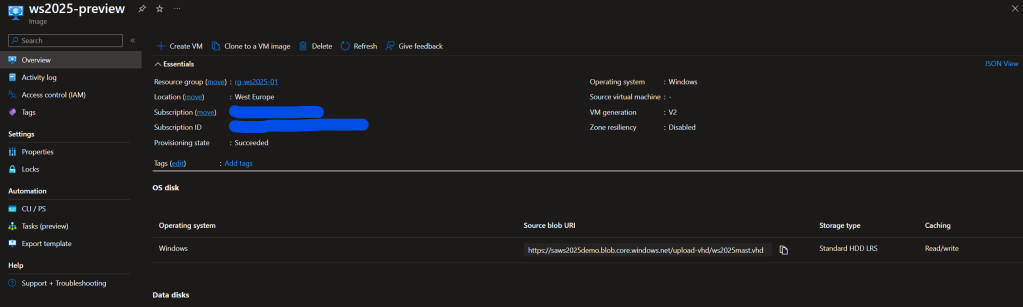
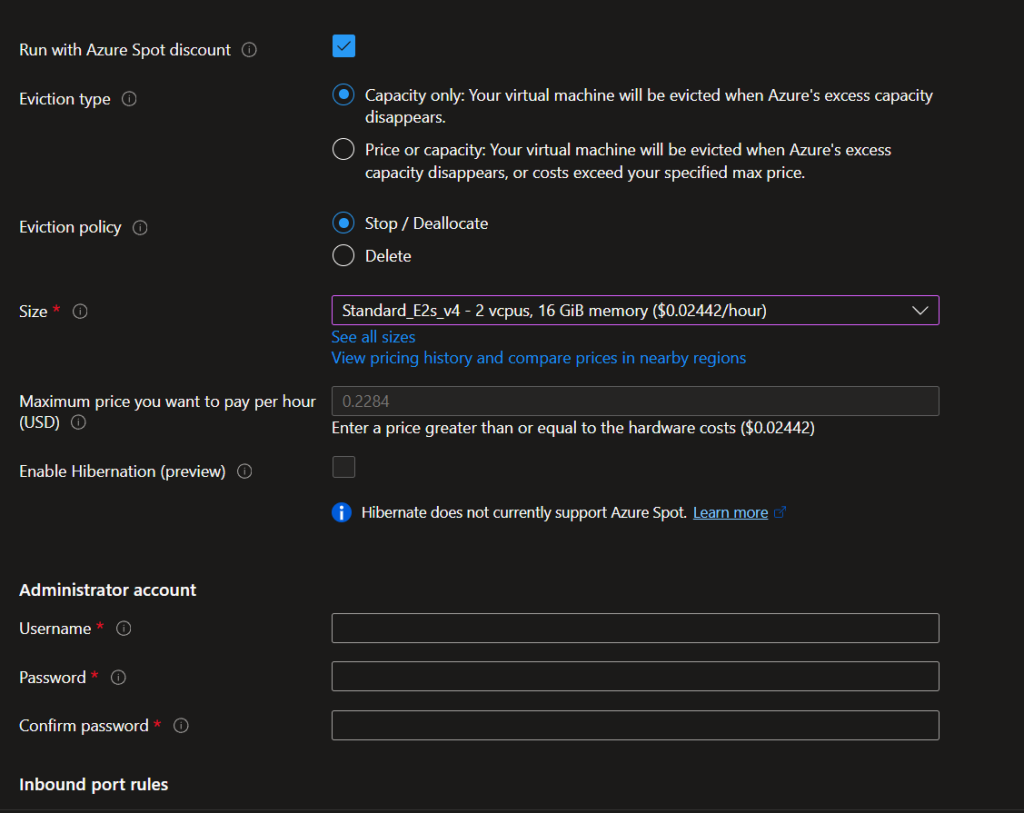
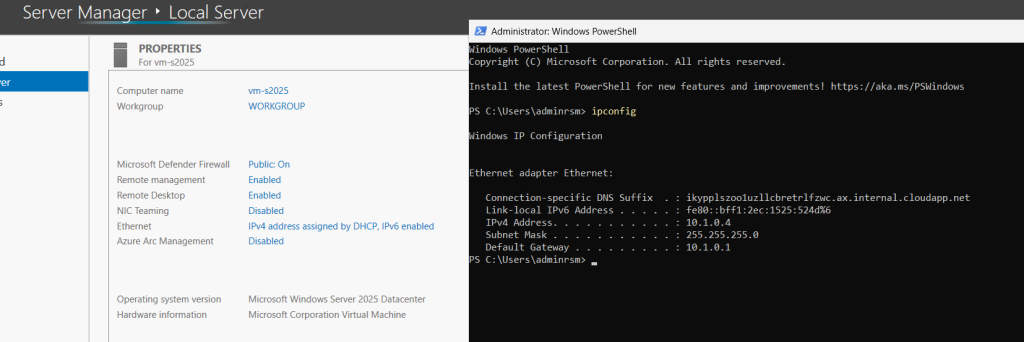
In this demo I’ll show you that you can also run Windows server 2025 in Azure. At this time there is not yet an default image available in Azure so you need to create your own image.
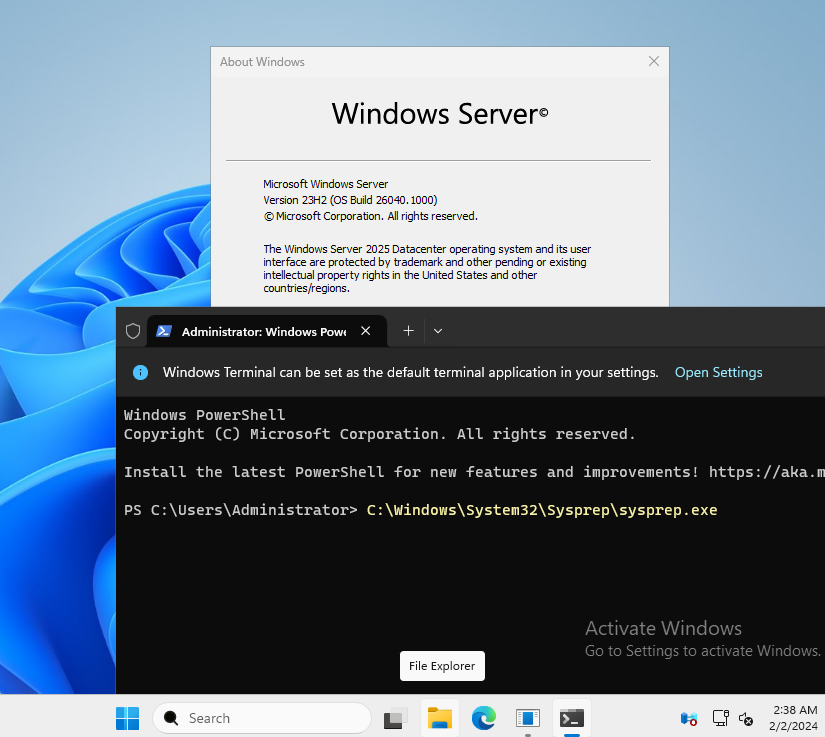
first we download the VHDX or ISO and create a local VM all standard. I used Hyper-v on Windows 11.
You have the flexibility to modify or add to the image as per your requirements. For the time being, I’ve utilized the default settings and proceeded directly to Sysprep. Let’s dive straight into Sysprep. Sysprep (System Preparation) is a Microsoft tool that allows you to prepare a system (usually a new one) for distribution, by stripping user- and computer-specific data from the system. This allows you to clone the system and deploy it to other computers. Sysprep can be found in the System32 folder of your Windows installation.
Make sure the settings in sysprep are OOBE , Generalize and shutdown
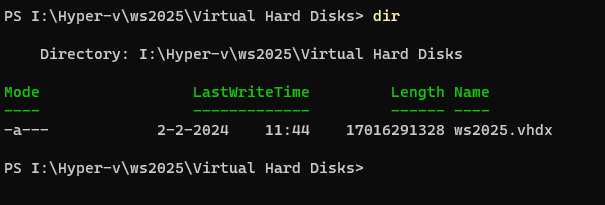
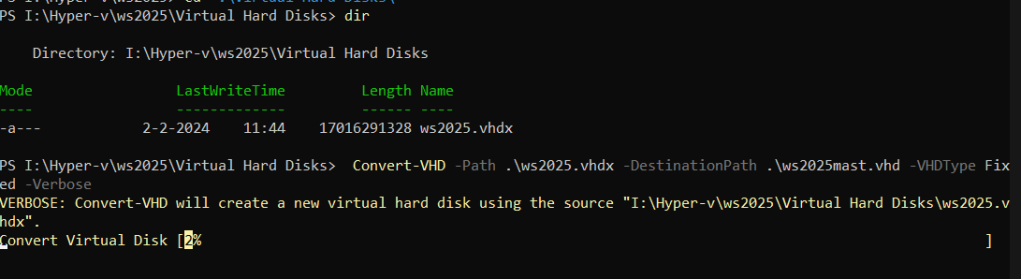
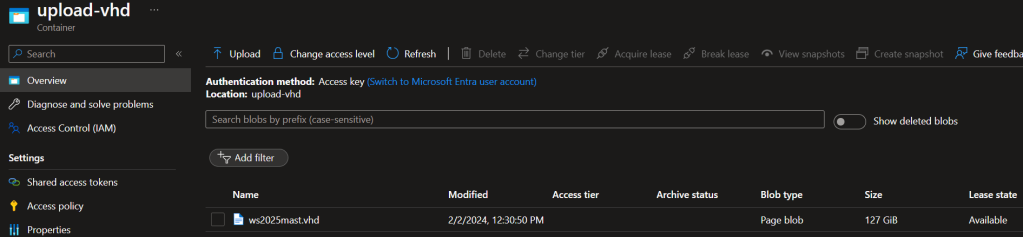
When the sysprep is done we neet to convert the disk, As the disk is vhdx we need to convert this to vhd. (azure requrements)
Make sure the type is set on fixed as when using dynamic disk the VM will not start in Azure. The conversion takes a few minutes depending on the speed of your computer.
Now we are ready to make some steps into Azure.
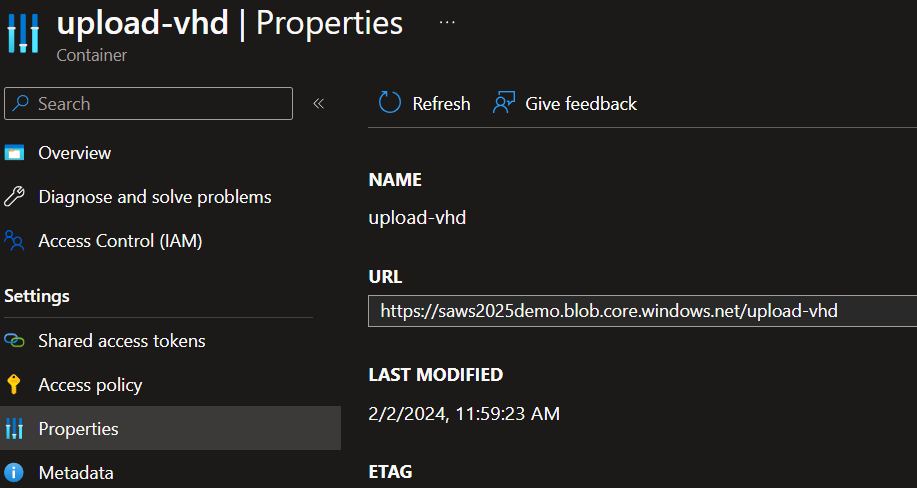
We create a Storage account or you could reuse the one you already have.
Uploading a Disk to Azure: A Step-by-Step Guide
Uploading a disk to Azure can be accomplished using a variety of tools such as Azure Storage Explorer, AzCopy, or a Shared Access Signature (SAS) token. Here’s a step-by-step guide on how to do it:
Using Azure Storage Explorer
Azure Storage Explorer is a convenient tool for managing Azure storage resources. Here’s how you can use it to upload a disk:
Download and install Azure Storage Explorer.
Connect to your Azure account.
Navigate to the storage account where you want to upload the disk.
Right-click on ‘Blob Containers’ and select ‘Create Blob Container’.
Give your container a name and click ‘Create’.
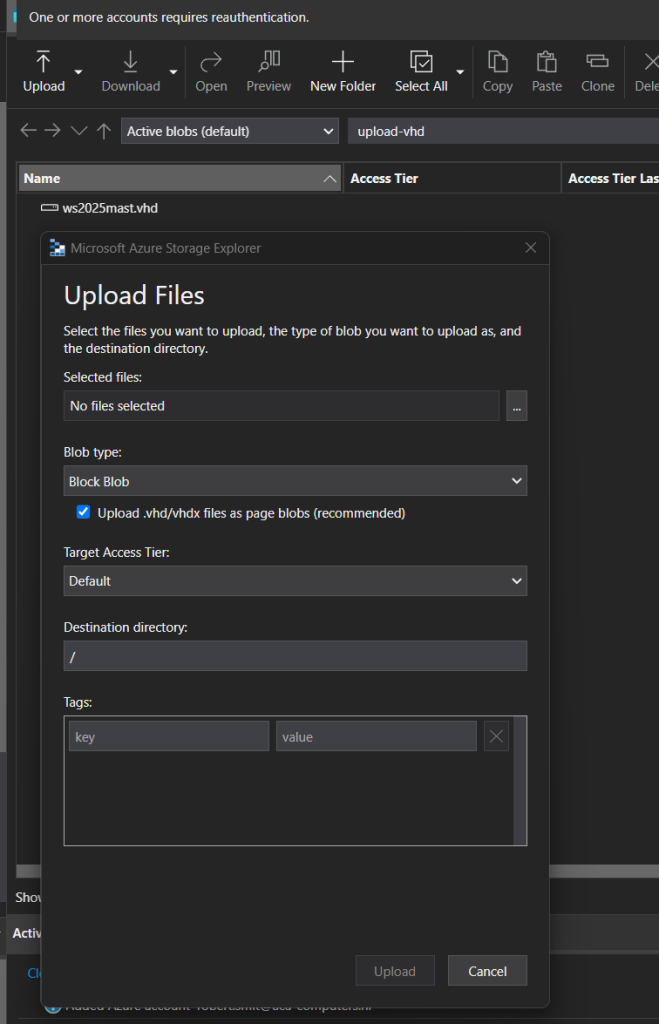
Navigate into your new container, click on the ‘Upload’ button, and select ‘Upload Files’.
Browse to your disk file, select it, and click ‘Upload’.
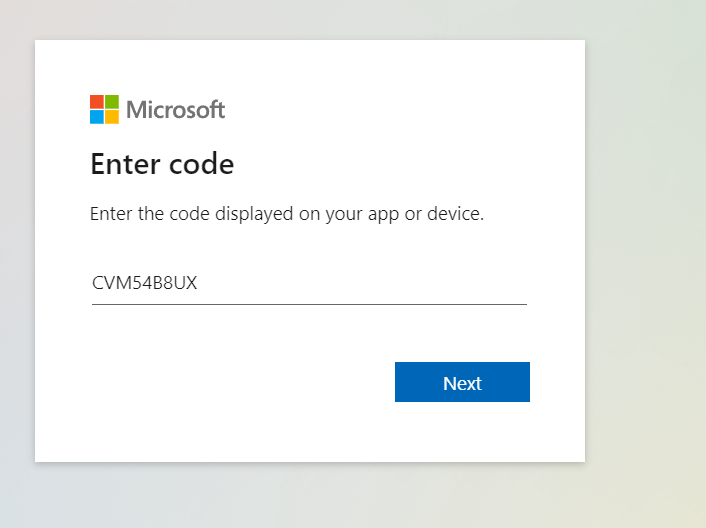
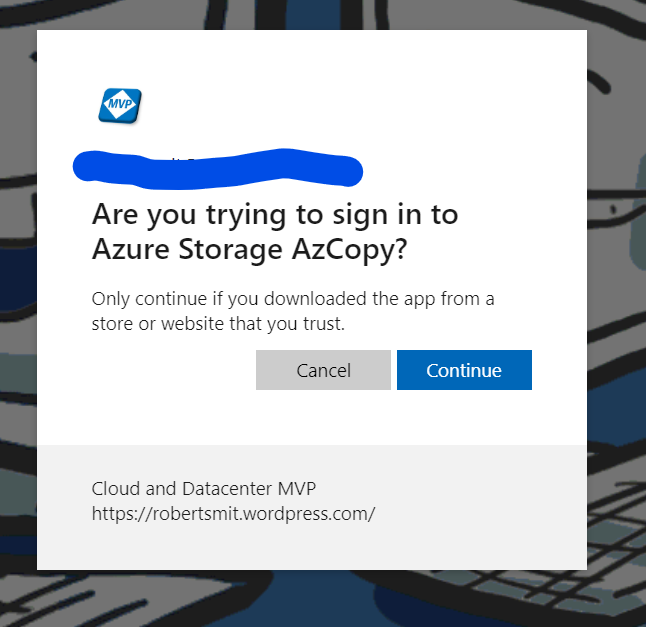
Using AzCopy
AzCopy is a command-line utility designed for high-performance uploading, downloading, and copying data to and from Azure Blob storage. Here’s how to use it:
Replace <local-file-path>, <account-name>, <container-name>, <blob-name>, and <SAS-token> with your specific details.
Using a SAS Token
A Shared Access Signature (SAS) provides secure delegated access to resources in your storage account. You can use a SAS token when you want to grant access to resources in your storage account without sharing your account keys. Here’s how to generate a SAS token:
Navigate to the Azure portal.
Go to your storage account.
Click on ‘Shared access signature’ under ‘Settings’.
Configure the fields as needed and click on ‘Generate SAS and connection string’.
Copy the SAS token and use it as needed.
Remember, each method has its own advantages. Azure Storage Explorer provides a graphical interface, AzCopy is great for automation, and SAS tokens provide a secure way to delegate access. Choose the one that best fits your needs.
For using AzCopy you need to donload it first. Download the AzCopy V10 executable file to any directory on your computer. AzCopy V10 is just an executable file, so there’s nothing to install.
Azure Bastion is a service you deploy that lets you connect to a virtual machine using your browser and the Azure portal, or via the native SSH or RDP client already installed on your local computer. The Azure Bastion service is a fully platform-managed PaaS service that you provision inside your virtual network. It provides secure and seamless RDP/SSH connectivity to your virtual machines directly over TLS from the Azure portal or via native client. When you connect via Azure Bastion, your virtual machines don’t need a public IP address, agent, or special client software.
Bastion provides secure RDP and SSH connectivity to all of the VMs in the virtual network in which it is provisioned. Using Azure Bastion protects your virtual machines from exposing RDP/SSH ports to the outside world, while still providing secure access using RDP/SSH.
A sample setup from Microsoft Learn
In basic the main purpose is get a RDP session to a VM without any VPN direct from the portal.
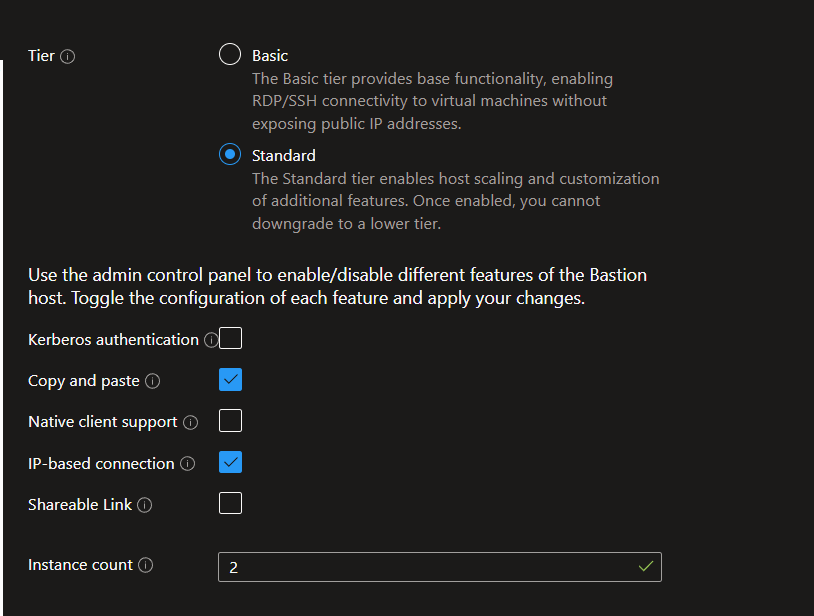
Bastion SKUs
Azure Bastion has two available SKUs, Basic and Standard and the big difference between hub spoke or singel network is that you will need the standard for a Azure virtual wan. only for this option : Connect to VMs via IP address.
don’t forget the IP based connection checkbox. copy past is just as you want this.
Deploying Azure Bastion within a Virtual WAN hub is not supported. You can deploy Azure Bastion in a spoke VNet and use the IP-based connection feature to connect to virtual machines deployed across a different VNet via the Virtual WAN hub.
So in basic it might be supported and it will work.
what is needed for the bastion ?
What I did is create a new network just for bastion, I used a /26 network use the Subnet
With the default Azure provided DNS I used the NSG, all just as you would do this in any other network.
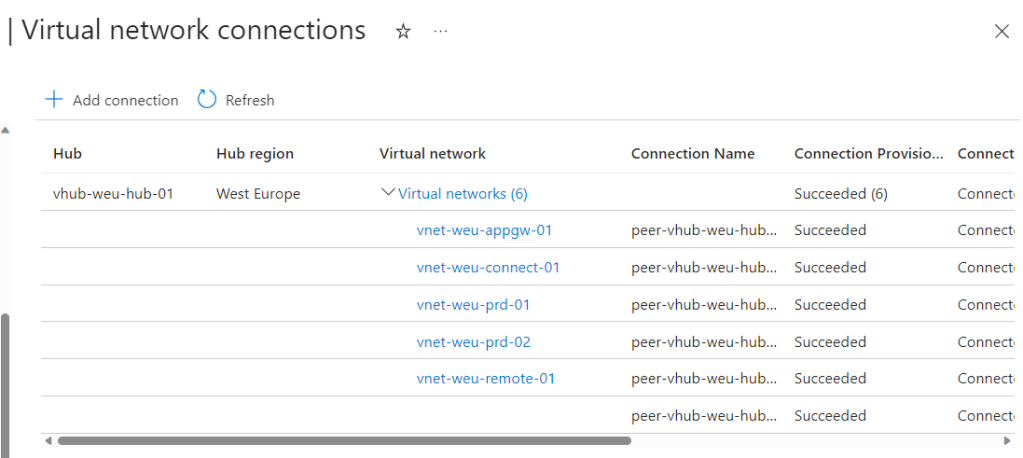
Here you can see it is part of my virtual wan just as the other networks
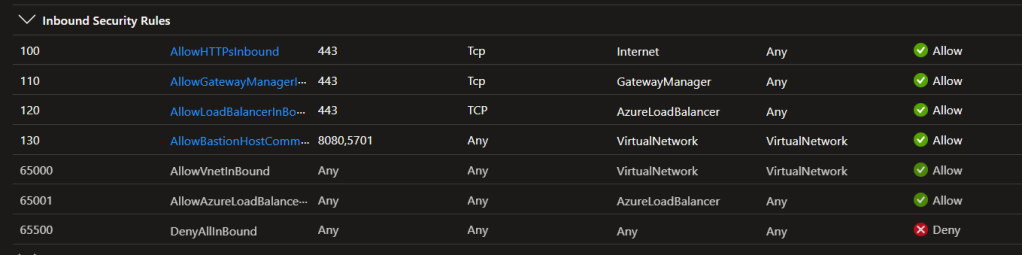
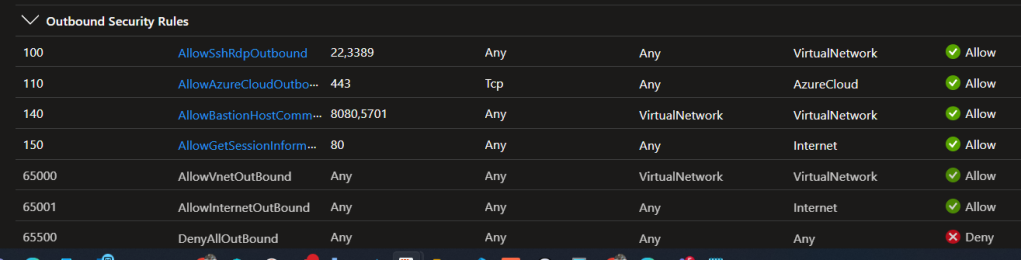
A quick overview of the Bastion NSG keep in mind this is important wrong configuration means no connection. This is all by the Microsoft book.
inbound bastion NSG rules
outbound bastion NSG rules
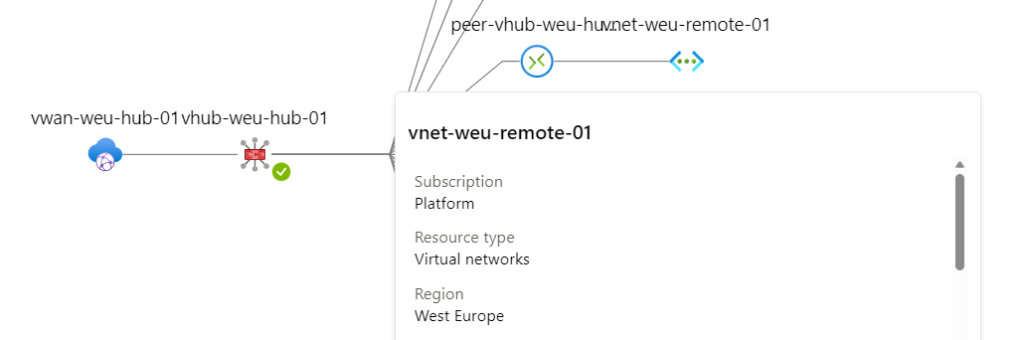
As I used a secure hub, this network need to be peered into the secure hub just as all your other networks in the virtual wan. my vnet remote is peered
A secured virtual hub is an Azure Virtual WAN Hub with associated security and routing policies configured by Azure Firewall Manager. Use secured virtual hubs to easily create hub-and-spoke and transitive architectures with native security services for traffic governance and protection
Here you can see the vnet-remote is connected to the secure hub
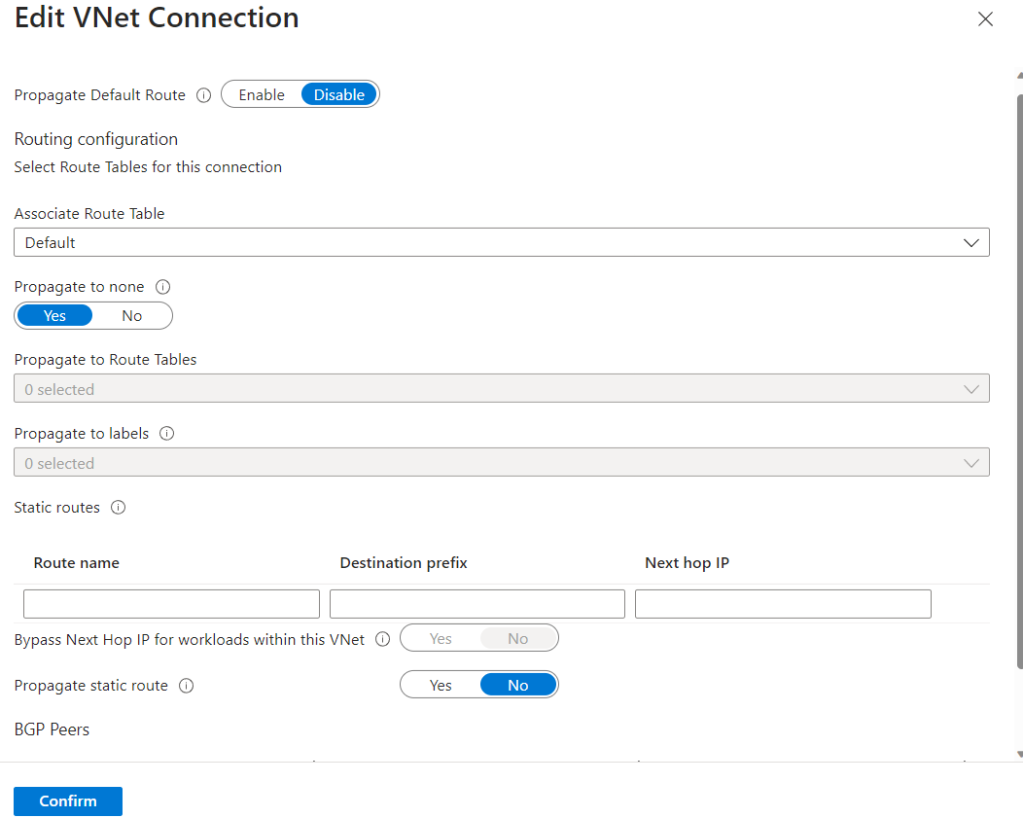
In this step there are a few things different as the default route is disabled and the static route is set to no. this can be changed later or just be configured at creation. our net step is setting the security configuration in the secure hub.
As the entry is not the firewall but we create a extra entrance for the bastion in our secure hub virtual network. where I made sure that the internet traffic is unsecured and protected by NSGs.
Well Done all this but I still don’t get connection well there is also a firewall in place right it is a secure hub.
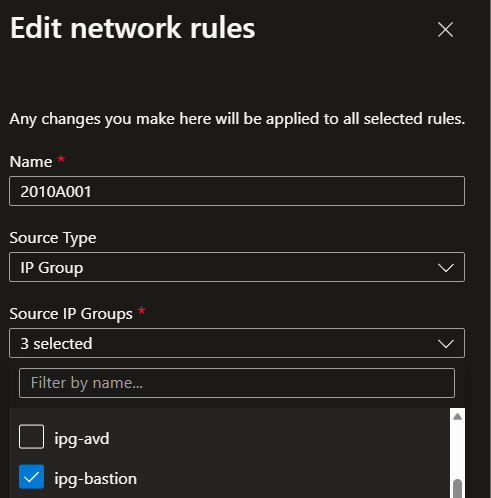
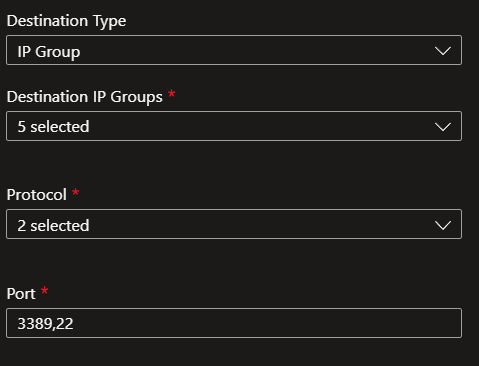
just create a Firewall rule open port 3389 or 22 or both if you need it. I use Ip groups so much easier and quicker to update you firewall.
In the destination you can add your destinations (vnets)
Now that the configuration is done it is time to test this.
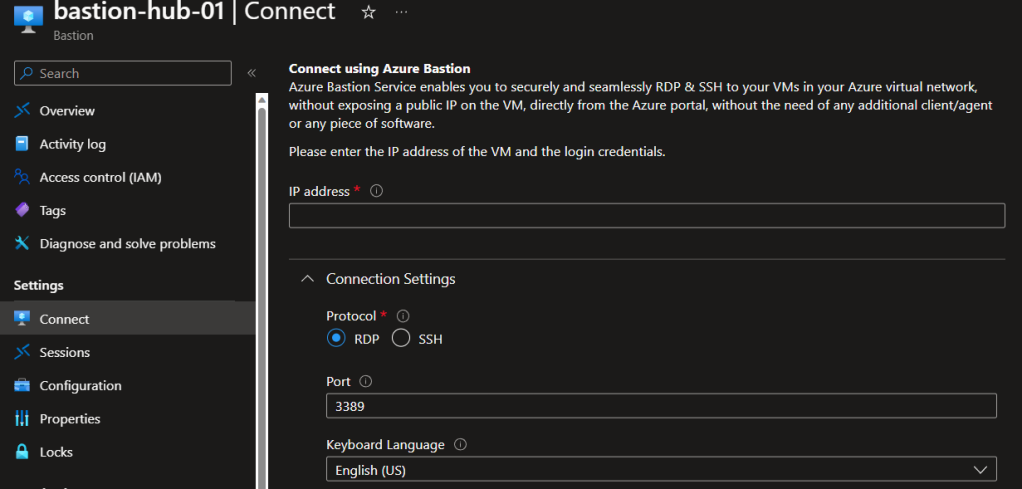
Keep in mind you have to go to bastion and use the IP number, the bastion option in the VM won’t work and will tell you there is no bastion.
So used my IP to the Azure VM and username and password and got a web based connection.
Keep in mind Always use MFA to the Azure portal connection.
Windows 11 22H2 Breaks virtual switches in Hyper-V
After updating to Windows 11 22H2 all my hyper-v VM’s did not work any more. vm’s where in save state and could not start anymore. There is just an easy fix and don’t panic your vm’s will run as normal with the setting change.
First the integration services need to be upgraded, in my case I had vm’s from server 2012 etc but these needs to be upgraded, so far my test lab.
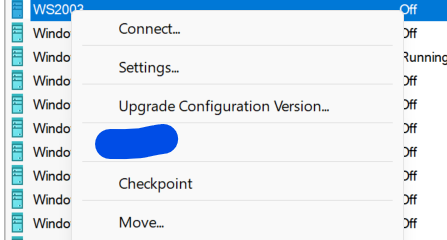
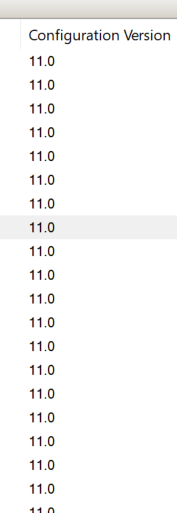
The error was upgrade the configuration version.
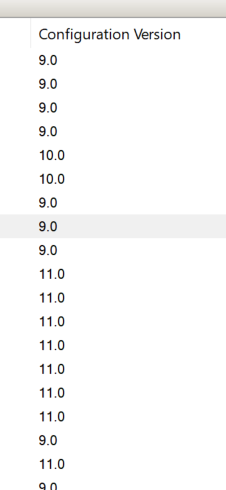
as you can see I have several versions, more about these configuration version can be found here
Upgrading the configuration version can be done in the gui easy if you have just a few vm’s or in powershell per vm or all at once.
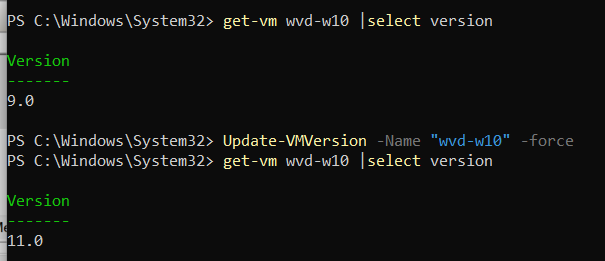
First lets see the version in powershell ( must run as administrator)
get-vm wvd-w10 |select version
Update-VMVersion -Name “wvd-w10” -force
get-vm wvd-w10 |select version
Update-VMVersion * -force
With these command I updated all vm’s , all are now version 11.0
With this the VM will start, but there was no network connection so there must be an issue with the hyper-v switch.
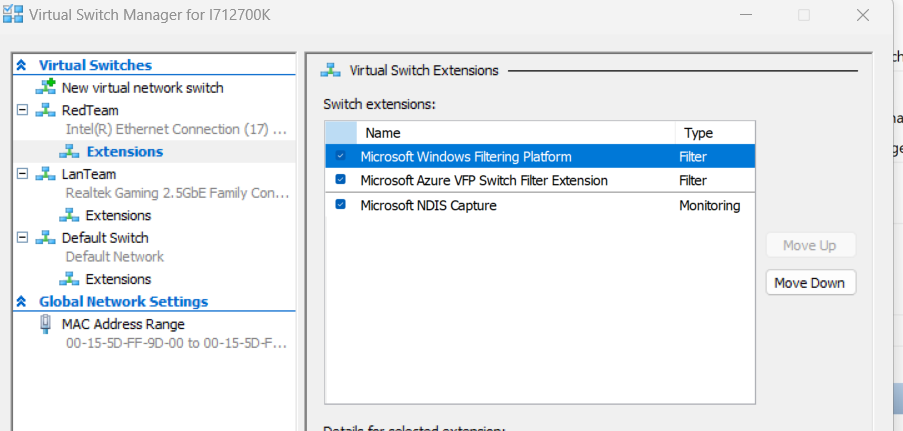
I noticed there was a default switch, Not sure if I created this in the past but I could not delete this switch, looking at the extensions of the vswitch all filter settings where tagged and that is also the issue.
UNTAG the Filters and the network connection is there Make sure you stop start the VM!
see here the two filters that are checked un check these two and apply and stop start the vm and it is all back to normal.
Annoying yes, but it is fixable and easy to fix, and I could blame my self for this as an Windows internal MVP, I did test the update but not in this scenario or to late I was a couple of builds behind.
Hope this post will help you fixing this issue quickly
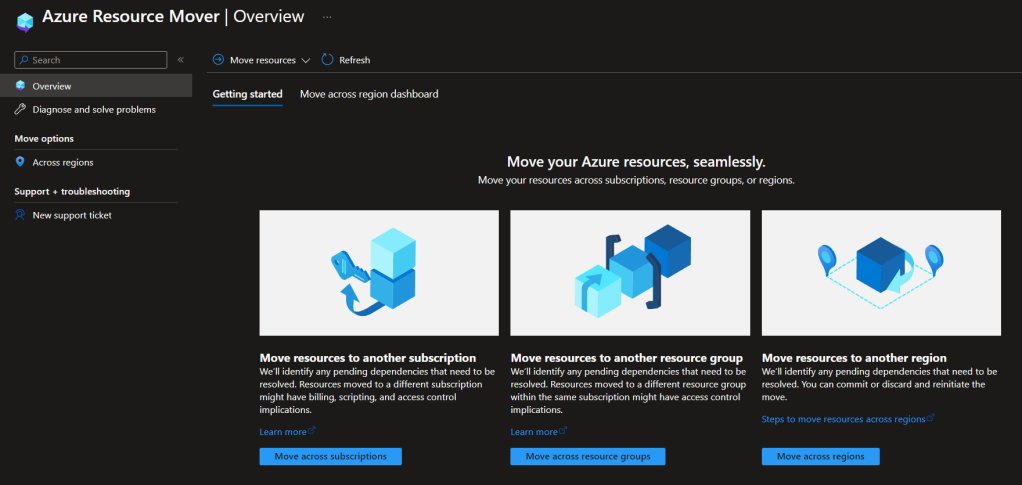
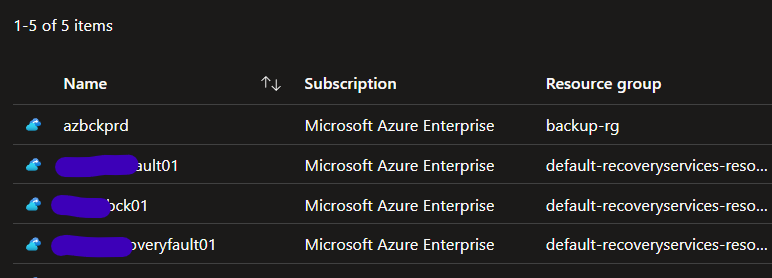
When working on migrations from datacenter to datacenter you often move the backup to a file storage keep it as archive. but when moving from Azure to Azure subscription that seems a bit more complicate. Well you could use Azure Recource mover. but that is no fun and In this case Powershell is so much easier.
In the old subscription I have a couple of Recovery servers vaults. I need them as Archive. First I made sure that all backups are stopped from the VM’s
For some time I build/rebuild many SQL sites and often migrate the “old” servers to Azure. Faced many challenges. Clustering FCI and Always On availability groups seen and build many configurations. But lately I did not so much SQL and now in my new lab setup I had an old issue. Looking at the problem many Google hits came along, good advice but not fixing the issue. The setup is a multiple region Azure virtual wan with secure hub Running Application’s in North Europe but some need to connect to West Europe also. But Failed to connect remotely. As many Security components are between this, I had to trim down the issue, to region to vnet. Oh and I used marketplace SQL servers handy and quick, and went against my own advise the next next finish approach never do that.
Step 1 the issue Failed to connect remotely to the SQL Server analysis service SSAS, got two instances running one tabular and one multidimensional
===================================
Cannot connect to VM-WEU-SQL-p-01:2399.
===================================
A connection cannot be made. Ensure that the server is running. (Microsoft.AnalysisServices.AdomdClient)
Program Location:
at Microsoft.AnalysisServices.AdomdClient.XmlaClient.Connect(ConnectionInfo connectionInfo, Boolean beginSession) at Microsoft.AnalysisServices.AdomdClient.AdomdConnection.XmlaClientProvider.Connect() at Microsoft.AnalysisServices.AdomdClient.AdomdConnection.XmlaClientProvider.Microsoft.AnalysisServices.AdomdClient.AdomdConnection.IXmlaClientProviderEx.ConnectXmla() at Microsoft.AnalysisServices.AdomdClient.AdomdConnection.ConnectToXMLA(Boolean createSession, Boolean isHTTP) at Microsoft.AnalysisServices.AdomdClient.AdomdConnection.Open()
Nice Error but no clue on the actual issue or how to solve this.
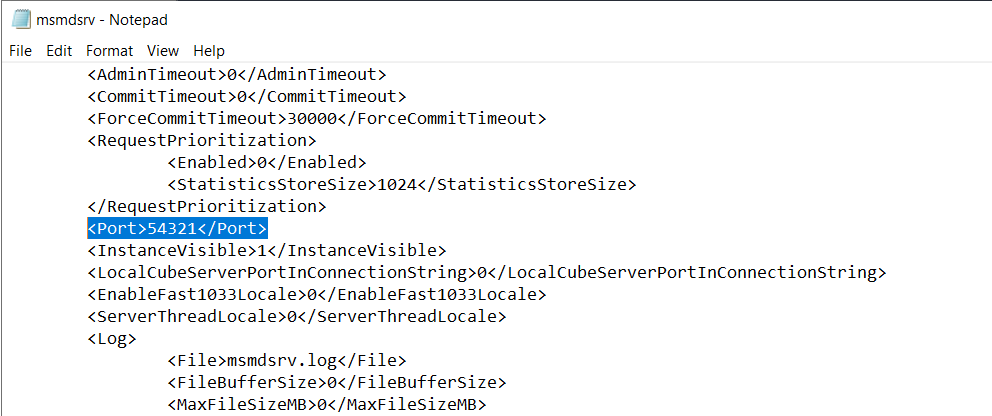
As the SQL Server analysis service uses an Ini file for the configuration it is easy to adjust it and test it.
Checking the port and removed IPv6
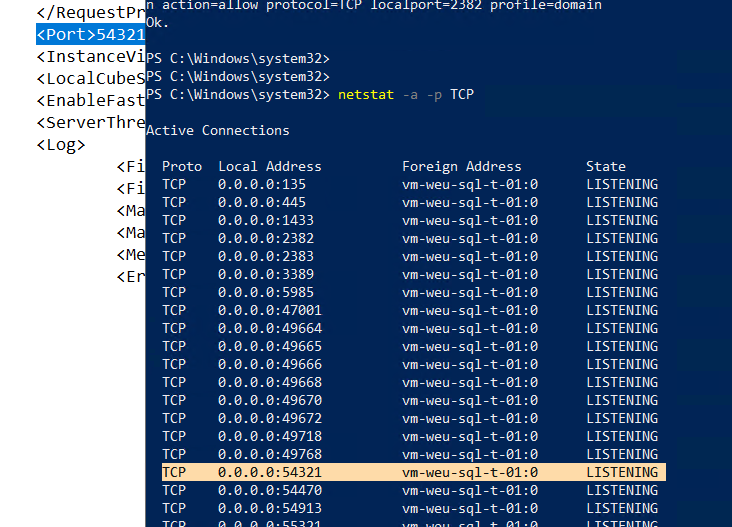
the good old netstat -a -p TCP shows me all the ports
and yes the port 54321 is used for the SQL.
Next checking the access rights also common on the internet solutions
Non of these fixes helped my problem. But the thing is if you have multiple instances running on the SQL server then you must use the port instead of the name
So vm-sql has instances sql01,sql02,sql03
then use vm-sql\sql01 when you are running this local but access this remote you must use vm-sql:portnumer vm-sql:12345
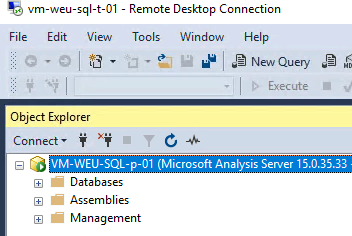
So in my case vm-weu-sql-p-01:54321
Then I noticed something when you are using and sql server with the default instance mssqlserver and a SQL Server analysis service SSAS, with a multidimensional instances. you can connect remotely on name SQL\instance.
With the broker services running you can connect on name, did not see this in any document. So keep this in mind running SSAS in a multiple instance config always use portnumbers.
Also keep in mind you application must support portnumbers!! If not use a default instance to avoid these issues, or use a better application that does support port numbers. Hope it helps you to find the right solution for you, let me know if you have or face this issue.
Azure Cloud Services (Classic) was a platform-as-a-service (PaaS) offering from Microsoft Azure that allowed developers to deploy, manage, and scale web applications and services in the cloud. However, Microsoft has announced that Azure Cloud Services (Classic) will reach its end-of-life (EOL) on September 1, 2023. In this blog post, I will provide an overview of Azure Cloud Services (Classic) and explain how to migrate your existing cloud services to the new Azure Resource Manager model.
Azure Cloud Service is a bit like an OS that is EOL, it is still running so why touch it, Well In PaaS someone else makes that choice for you. Preventing you for running Old unsecure apps. A quick query showed me this.
In 2014, Microsoft launched infrastructure as a service (IaaS) on Azure Resource Manager. We’ve been enhancing capabilities ever since. Because Azure Resource Manager now has full IaaS capabilities and other advancements, Microsoft deprecated the management of IaaS virtual machines (VMs) through Azure Service Manager (ASM) on February 28, 2020. This functionality will be fully retired on September 1, 2023. #hardstop
Today, about 90 percent of the IaaS VMs are using Azure Resource Manager. If you use IaaS resources through ASM, start planning your migration now. Complete it by September 1, 2023, to take advantage of Azure Resource Manager.
VMs created using the classic deployment model will follow the Modern Lifecycle Policy for retirement.
But many vendors or apps are still using the old Azure Classic and I must say it is interesting to see what projects are all exposed to the web, a couple of query’s of some apps and some high traffic pages like Cumberland Farms | Convenience Stores and Gas (cfi-webauth-01.cloudapp.net) anyone can reach out if they need help on migration(shameless plugging)
As of February 28, 2020, customers who didn’t utilize IaaS VMs through ASM in the month of February 2020 can no longer create VMs (classic).
On September 1, 2023, customers will no longer be able to start IaaS VMs by using ASM. Any that are still running or allocated will be stopped and deallocated.
On September 1, 2023, subscriptions that are not migrated to Azure Resource Manager will be informed regarding timelines for deleting any remaining VMs (classic).
This retirement does not affect the following Azure services and functionality:
So have a good look at your Azure Resources and IF you do use Azure Classic Take Action now!.
Migrate Azure Classic (ASM) To Azure ARM (Azure Resource Manager) Cloud be easy or not, there is no onesize fits all but below I do some basic steps that get you started.
Before starting the migration process, it is important to have the following prerequisites in place:
An Azure subscription with permissions to create and manage resources.
A basic understanding of Azure ARM templates and deployment processes.
Familiarity with the Azure Portal and PowerShell.
Existing Azure Cloud Services (Classic) deployed and running.
Create a new Azure Resource Group to contain the resources that will be created during the migration process.
Review the existing Azure Cloud Services (Classic) deployed to identify the resources needed for the migration process.
Export the configuration of each existing Azure Cloud Service (Classic) by running the following command in PowerShell
Get-AzVM –ResourceGroupName <Name> | Export-AzVM
Modify the configuration of each exported VM to work with ARM by replacing the cloud service name with the new resource group name.
Convert each of the exported VMs to ARM templates by running the following command in PowerShell
ConvertTo-AzureRMVMResource –ResourceId <Cloud Service Resource ID> –OutputFolder <Output Folder>
Create a new ARM template to describe the new environment, including the new resource group, virtual network, and storage account.
Modify the ARM template to include the exported VMs and the required configuration for each VM.
Deploy the ARM template to create the new environment and VMs.
Test the new environment to ensure that all VMs are running and that the application is working correctly.
Redirect traffic from the old Azure Cloud Service (Classic) to the new ARM environment by updating the DNS configuration.
Decommission the old Azure Cloud Service (Classic) and associated resources.
Conclusion:
The Sample above shows some old AzureRM commands and are replaced by AZ commands. This shows also the methods as not only the Azure portal as resources but also the PowerShell modules needs to be updated!! Migrating from Azure Cloud Services (Classic) to Azure ARM can be a complex process, but it is essential for organizations to take advantage of the latest features and benefits of the Azure platform. By following the (sample) step-by-step guide outlined above, organizations can migrate their existing Azure Cloud Services (Classic) to the new ARM environment, ensuring that their applications and services continue to run smoothly and efficiently.
Also when migration Take a good look at your Azure Foundation does it still Fit is the Governance conform WAF / CAF Enterprise-Scale
Some database workloads like SQL Server require high memory, storage, and I/O bandwidth, but not a high number of cores. Many database workloads are not CPU-intensive. Azure offers pre-defined VM sizes with lower vCPU count which can help to reduce the cost of software licensing, while maintaining the same memory, storage, and I/O bandwidth.
The available vCPU count can be reduced to one half or one quarter of the original VM specification. These new VM sizes have a suffix that specifies the number of available vCPUs to make them easier for you to identify. There are no additional cores available that can be used by the VM.
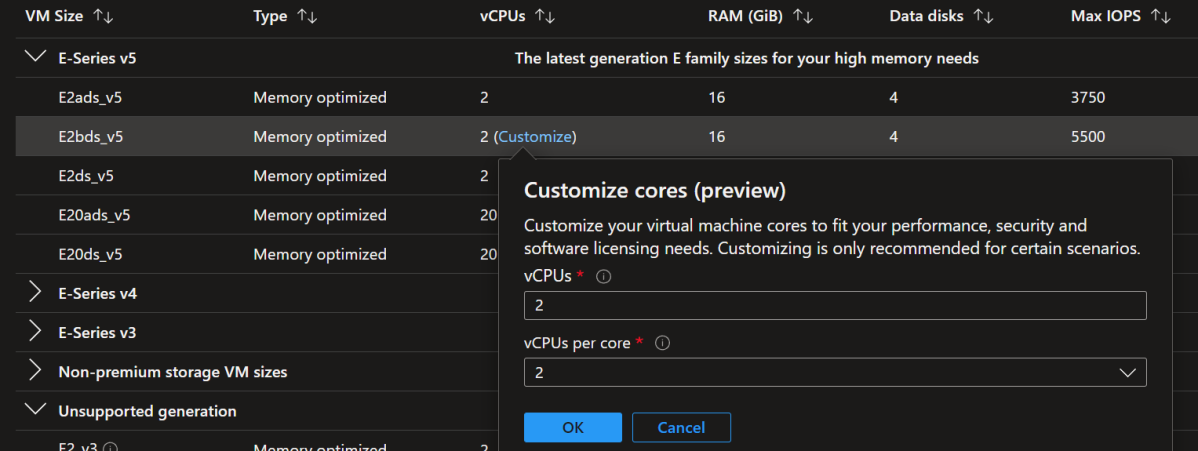
For example, the Standard_E32s_v5 VM size comes with 32 vCPUs, 256 GiB RAM, 32 disks, and 80,000 IOPs or 2 GB/s of I/O bandwidth. The pre-defined Standard_E32-16s_v5 and Standard_E32-8s_v5 VM sizes comes with 16 and 8 active vCPUs respectively, while maintaining the memory, storage, and I/O bandwidth specifications of the Standard_E32s_v5.
The licensing fees charged for SQL Server are based on the avaialble vCPU count. Third party products should count the available vCPU which represents the max to be used and licensed. This results in a 50% to 75% increase in the ratio of the VM specs to available (billable) vCPUs. At this time, the VM pricing, which includes OS licensing, remains the same as the original size.
Configure a custom number of vCPUs to reduce the number of vCPUs that are available to the virtual machine. This can help you save on vCPU software-based licensing costs. This may have performance and cost implications.
Try the Virtual machine selector to get the right Virtual machine. there are many option to pick the right VM size, at the end the main thing is you application needs to run optimal, and yes the finance department want to have minimal costs. finding the sweet spot is not always easy, do not start with a B type SKU as these are limited in CPU this is perfect if you already know it doesn’t need 90% CPU all the time.
There are many Azure sku types and all based on ACU keep a close look on ACU and cost vs performance, lower vm cost does not mean lower operation costs. try to install a large package on a B SKU and on a Standard_E2bds_v5 and size back if you can. Learn more about how Azure compute units (ACU) can help you compare compute performance across Azure SKUs.
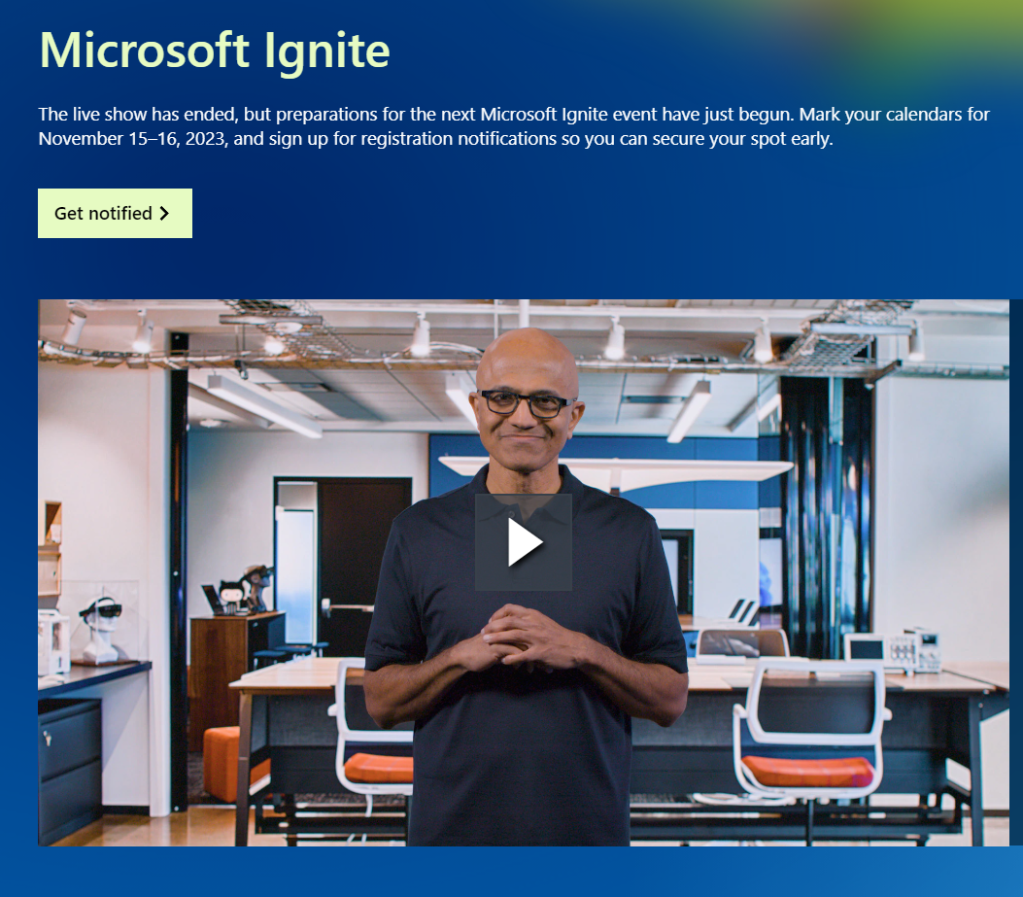
As always you are waiting for some good events and #MSIgnite is a great event, this year 2022 is was hybrid, for me to limited to join in person, but as always great content is announced.
Special this year was I joined the Learn Live and I did a Session with Tomasso Groenendijk follow him on Twitter @tlagroenendijk
The session was about Design Azure Site Recovery, basic this is just the learn module from the microsoft learn But we made it a bit more interactive and added some real live experience in it. A big thanks To the Viewers as it was late and not a real topic that has many interests. So thanks and thanks for the rating and comments.
There is an on-demand option so you can watch it again or just leave me a note on twitter / linkedin or blog if you have a question.
The Cloud Adoption Framework for Azure enterprise-scale landing zone architecture varies between customers. So there is no one size fits all but there is a lot in common that can be reused next time.
Often I hear Azure Enterprise-scale is not for me it is enterprise. Wrong anyone can use the CAF and Azure Enterprise-scale. as it is modular by design. But if you have just 1 VM there is still some usage that you could use say the management groups or monitoring ,RBAC.
The enterprise-scale approach to construct landing zones includes three sets of assets to support cloud teams:
Design guidelines: Guide to the critical decisions that drive the design of the Cloud Adoption Framework for Azure enterprise-scale landing zone.
Architecture: Conceptual reference architecture that demonstrates design areas and best practices.
Implementations: Azure Resource Manager template of the architecture to accelerate adoption.
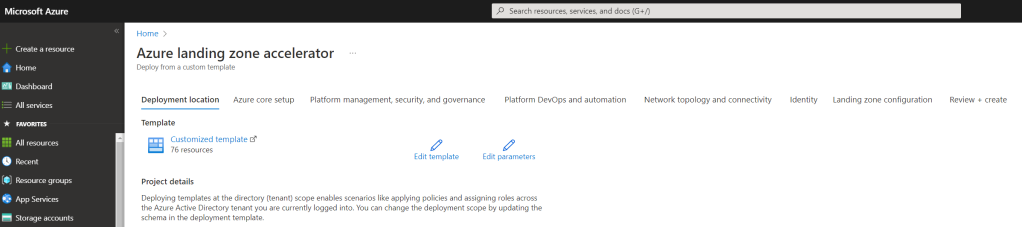
But how do we start with this what to build Well Microsoft made this easy there is a accelerator that I will explain below.
With this solution accelerator you can setup the foundation in one process.
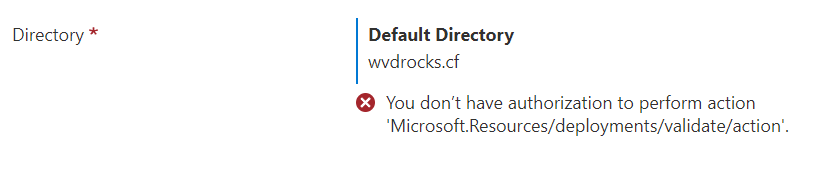
Often there is this error showing even if you are an Azure subscription owner
You don’t have authorization to perform action ‘Microsoft.Resources/deployments/validate/action’.
This can be fixed by adding the user account to the Owner role at Tenant root scope. This can only be done with powershell assign Owner role at Tenant root scope (“/”) as a User Access Administrator to current user New-AzRoleAssignment -Scope ‘/’ -RoleDefinitionName ‘Owner’ -ObjectId “user objectID”
go to the user and grab the object ID
Now that everything is ready we can start.
Choose where the instance needs to land, pick the proper region for your azure resources. If your default is west europe then choose west europe here
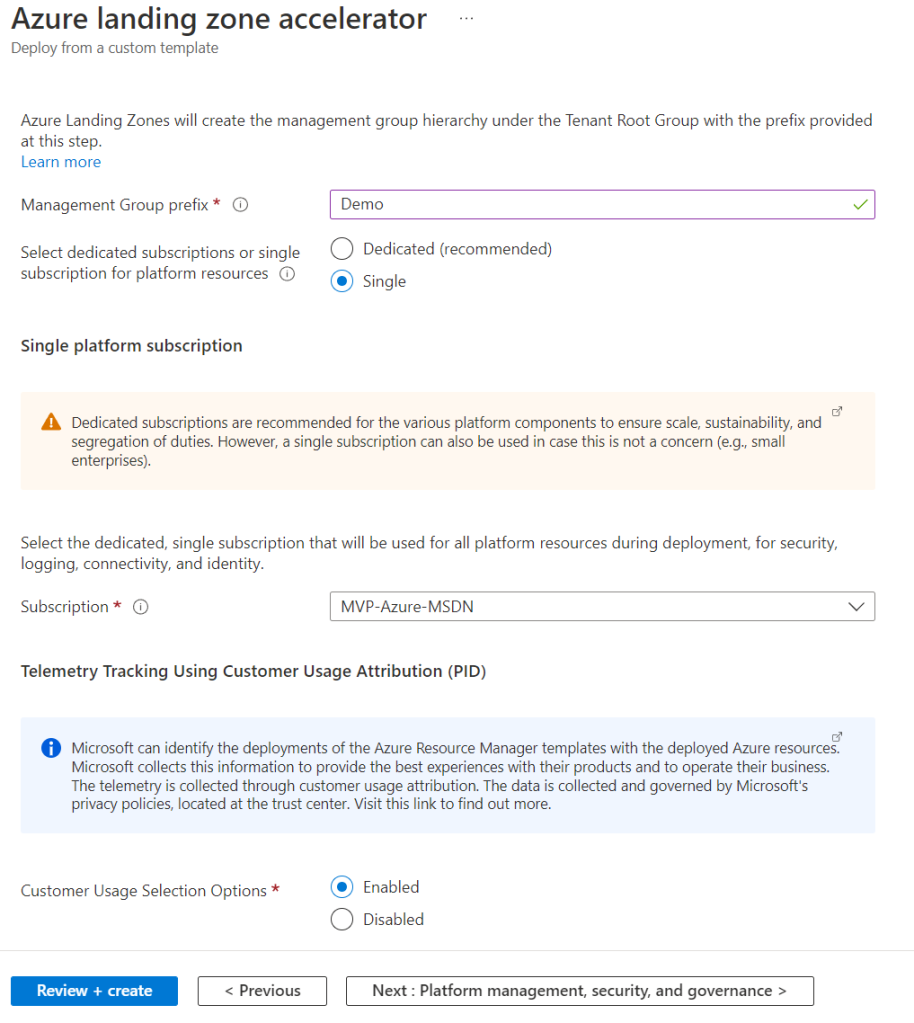
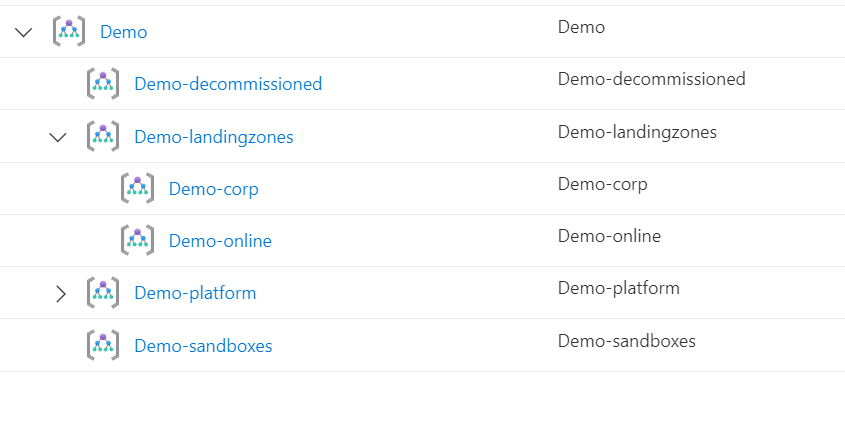
As I did not want to deploy it in a dedicated subscription, I’ll pick my own. the prefix for the management groups is based on the text that is visible later.
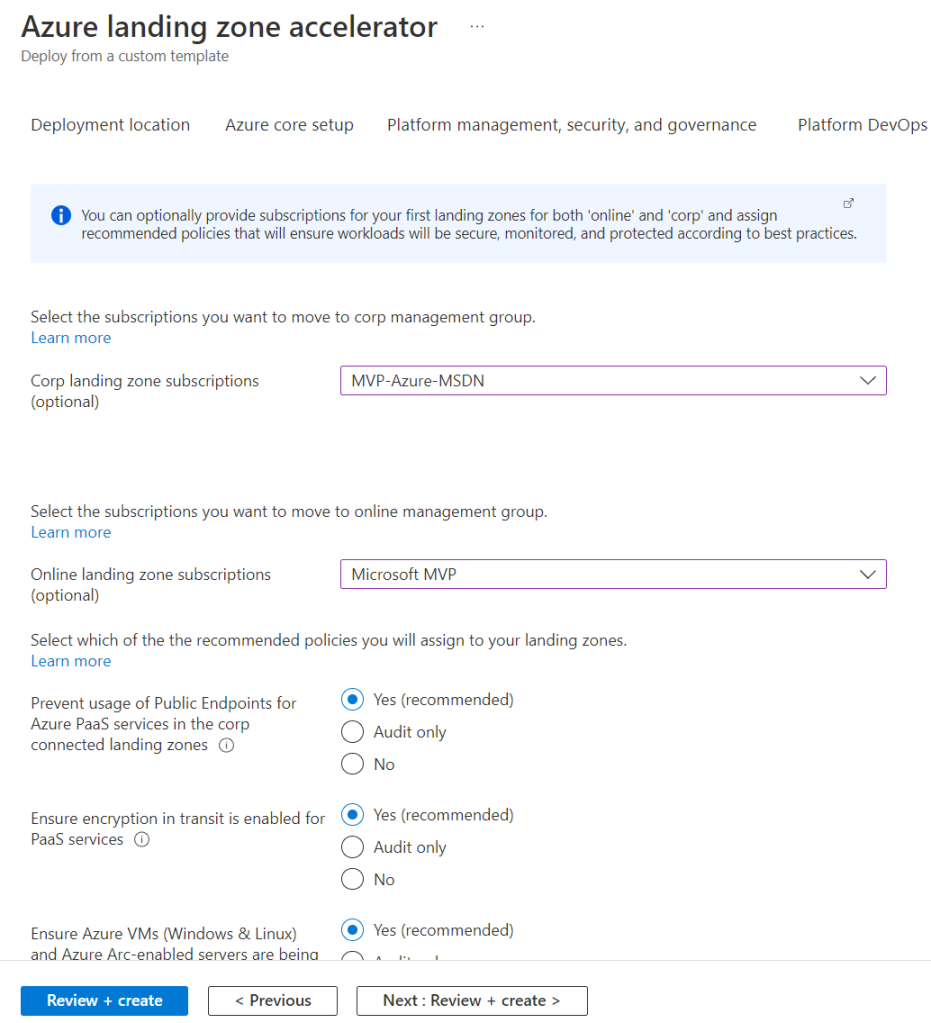
The management groups holds the subscriptions and policys can be placed on the management groups.
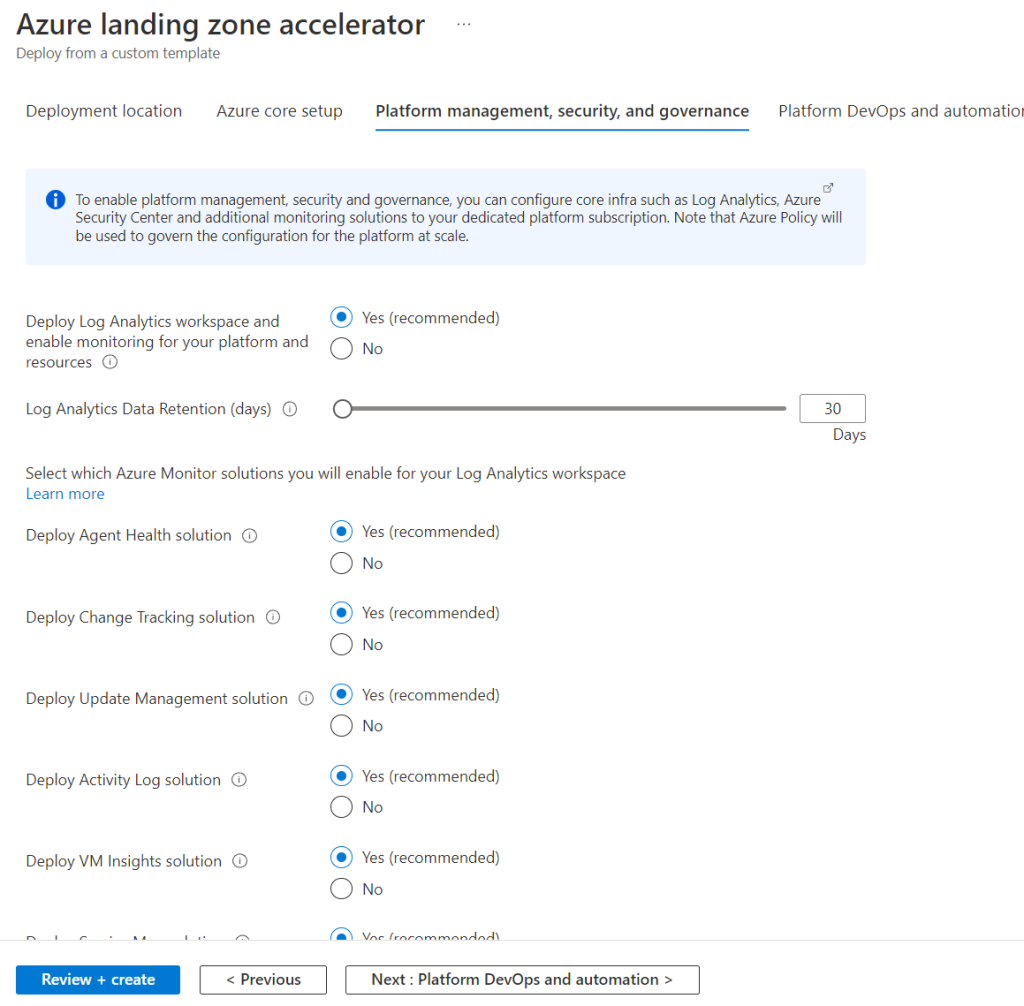
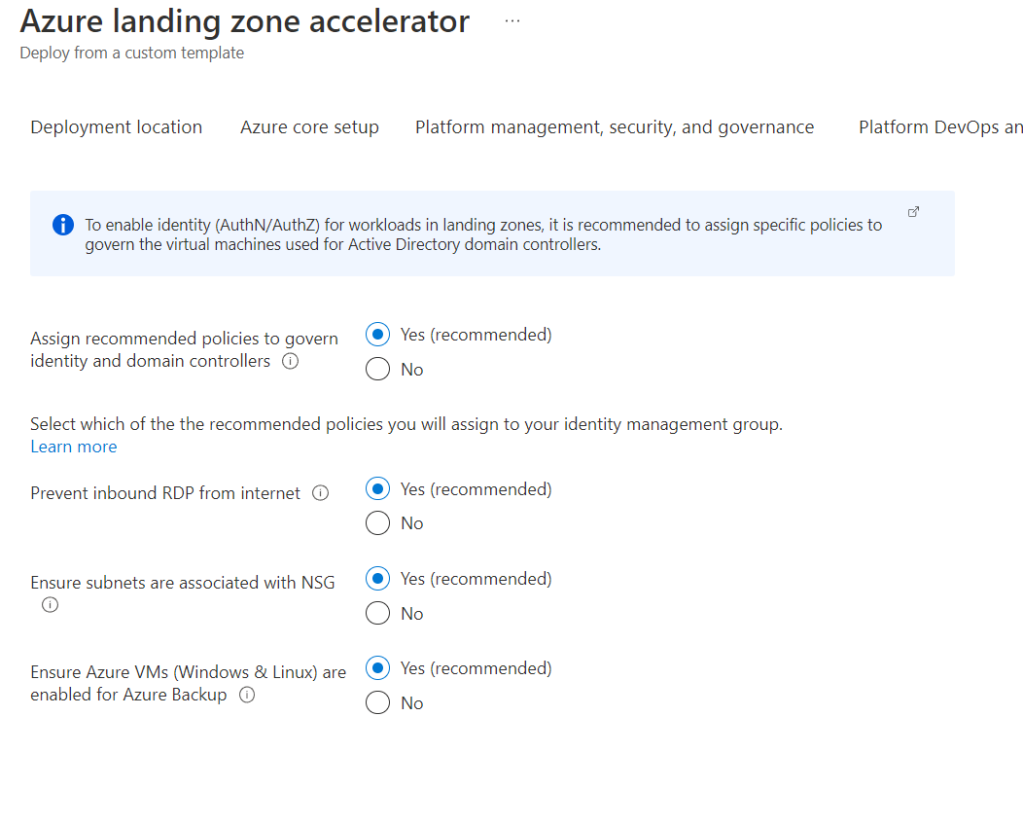
Here are the options for the log analytics and the policys. to keep a good governance you need logging and policy’s in the Azure Microsoft defender for cloud you can see later the policys and the secure score.
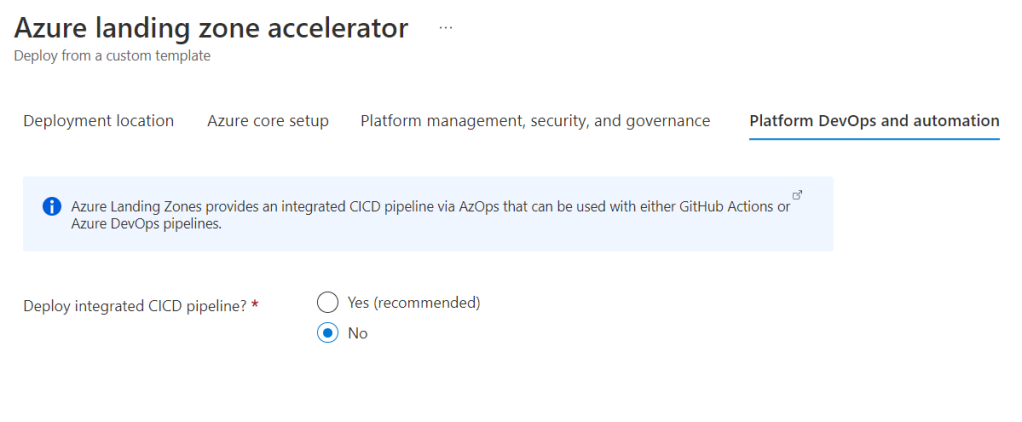
At this time I don’t want to use the devops pipeline. but it is a great add on and you can start from there with the pipeline deployment
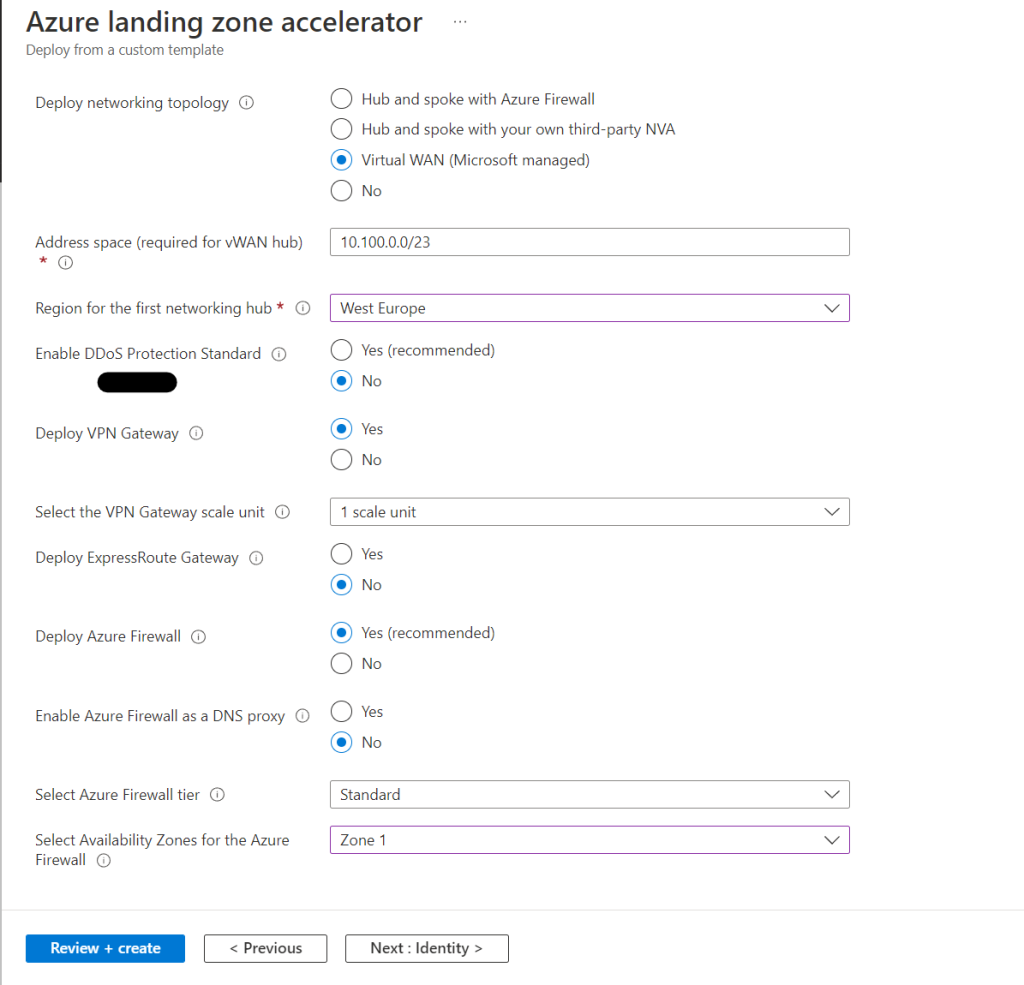
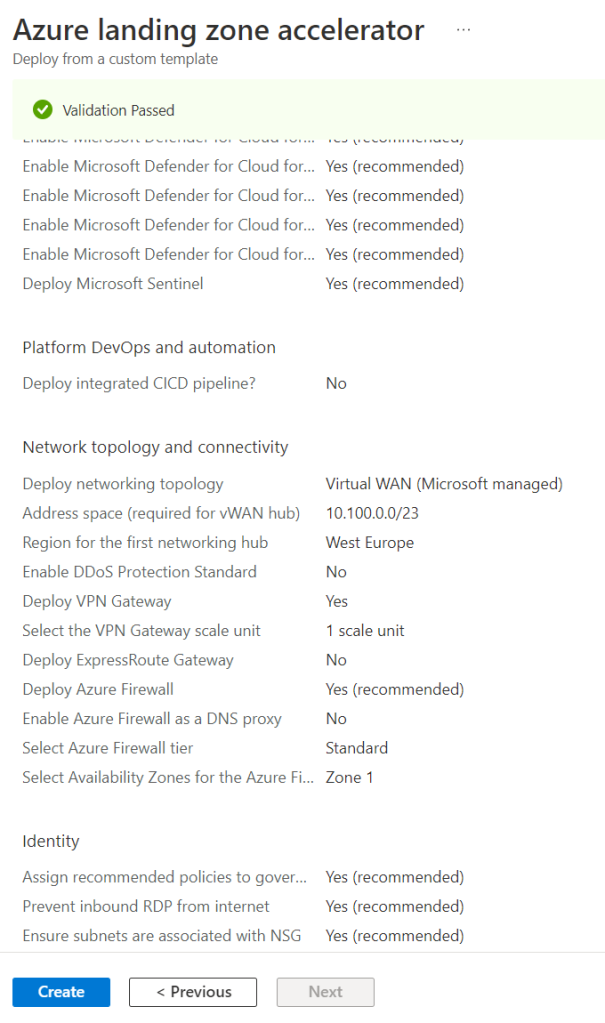
Now you need to choose the deployment go for a hub spoke or Azure virtual wan. Depending on your needs, personally I’m a big fan of Azure virtual wan so I’ll choose this. As optional resources can be added as:
DDoS Protection Standard
Azure Private DNS Zones for Azure PaaS services
VPN and ExpressRoute Gateways
Azure Firewall
With these options you may need to choose the right sku and a proper subnet and or zone redundancy.
I choose the standard sku, this is without the IDS and TLS inspection, best option is choose premium.
Always use a NSG on your network, never never never add a vm direct to the web.
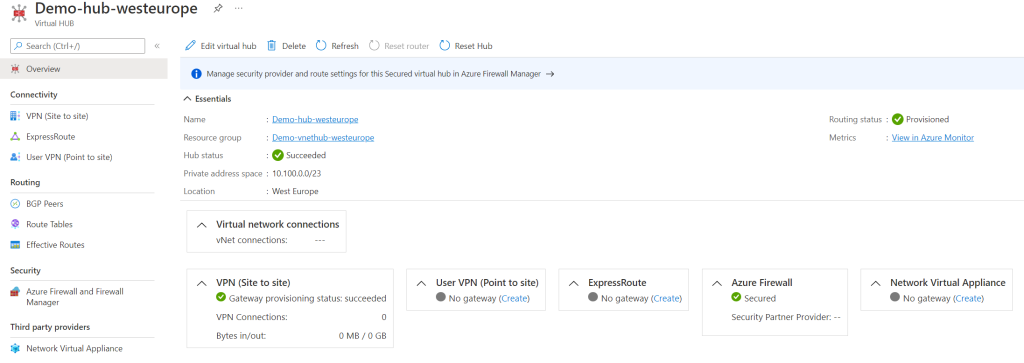
Now that the deployment is ready we can view de Azure virtual wan with the firewall.
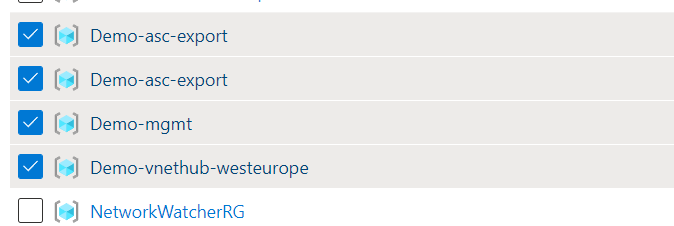
The deployment of the resources are easy to find as the prefix is used on all the resources
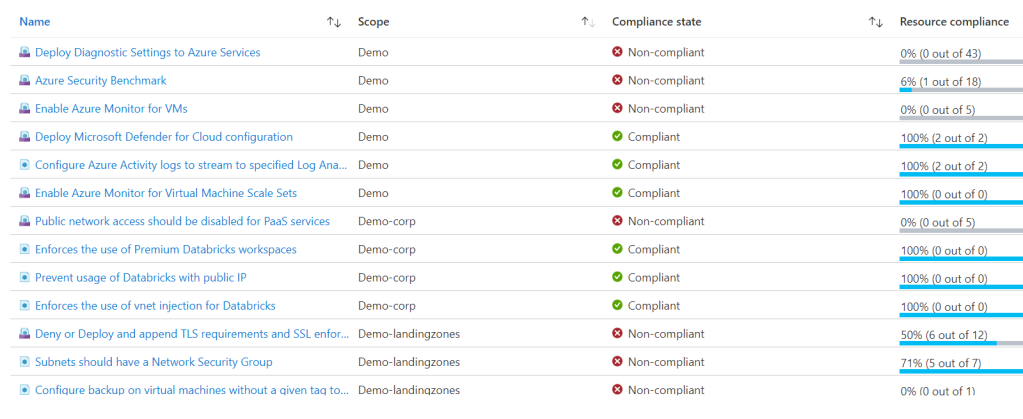
Looking at the log analytics and de policys, always check this. maybe you need to adjust the workload and or add extra settings on the workload the make things compliant.
Overall the template is a great starter, and yes you need to configure a lot more than just the foundation, but this gives you a good understanding on what is needed and what to connect and play with the resources.
System Center – Virtual Machine Manager (VMM) Is there for a long time, many used this as the primary tool for managing the virtual and physical environment, but now days Cloud is playing more and more a big role in the infrastructure, Tools are also switching with Azure Arc or with Windows Admin center you have some powerfull tools that can mange the infrastructure.
Hybrid management with Azure
Efficiently managing IT resources that are sprawled across various locations without slowing down developer innovation is a key challenge that IT leaders face today. Azure Arc enables you to seamlessly govern, manage, and secure Windows and Linux servers, Kubernetes clusters, and applications across on-premises, multiple clouds, and the edge from a single control plane.
I must say I see less and less Vmware and VMM as I move them all to Azure. but in the meantime many of you will still using this so here is a little guide on how to upgrade from VMM 2019 to VMM 2022.
Make sure the following steps are taken, else you will see some errors, I tried to simulate that so that you can see the expected error message.
Complete any jobs that are currently running in VMM. note that the jobs history is deleted during the upgrade.
Close any connections to the VMM management server, including the VMM console and the VMM command shell.
Close any other programs that are running on the VMM management server.
Ensure that there are no pending restarts on VMM servers.
Perform a full backup of the VMM database.
If the current SQL Server database used Always On availability groups:
If the VMM database is included in the availability group, remove it in SQL Server Management Studio.
Initiate a failover to the computer that is running SQL Server, on which the VMM database is installed.
If you’re running Operations Manager with VMM, disconnect the connection between VMM and Operations Manager server.
Uninstall the System Center VMM
Go to Control Panel > Programs > Program and Features, select Virtual Machine Manager and click Uninstall.
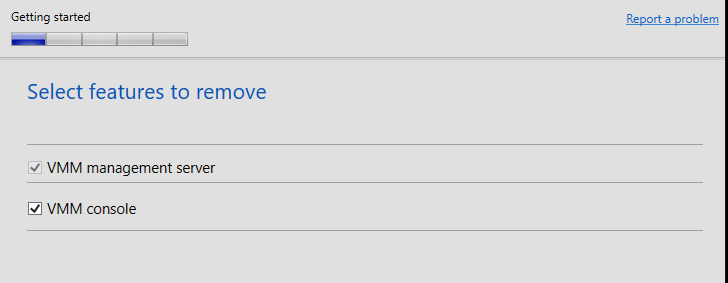
On the Uninstall wizard, select Remove Features, select both VMM management Server and VMM Console under the features to remove.
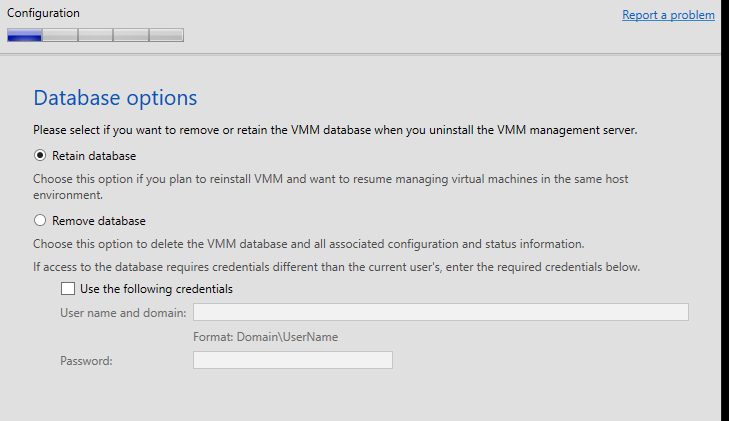
On database options page, select Retain database.
Review the summary and click Uninstall.
Remember if you have multiple consoles you need to upgrade these also.
Now that VMM is uninstalled we can proceed. Make sure the check box is checked RETAIN Database
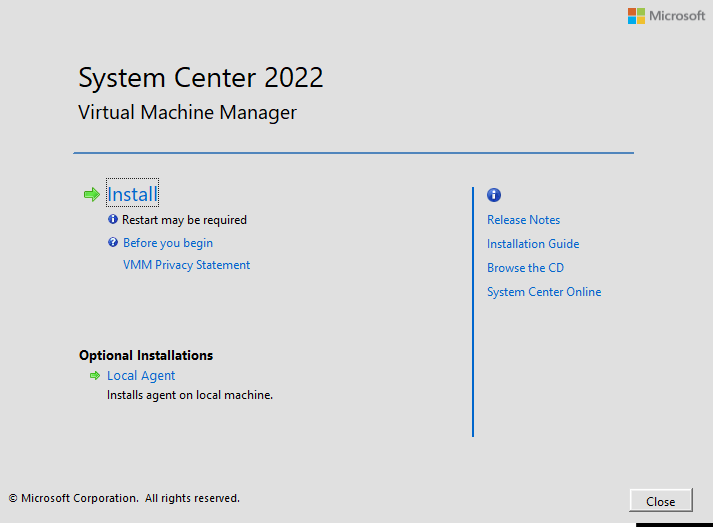
Now we can start the setup again.
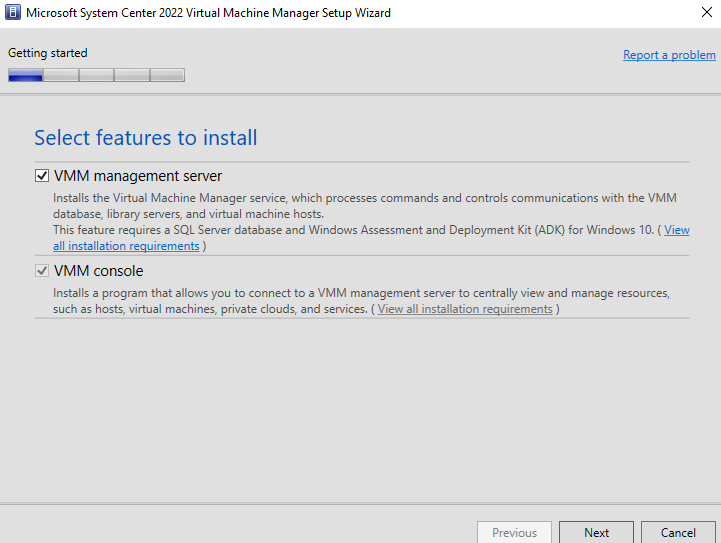
We do a full install Console and Management server.
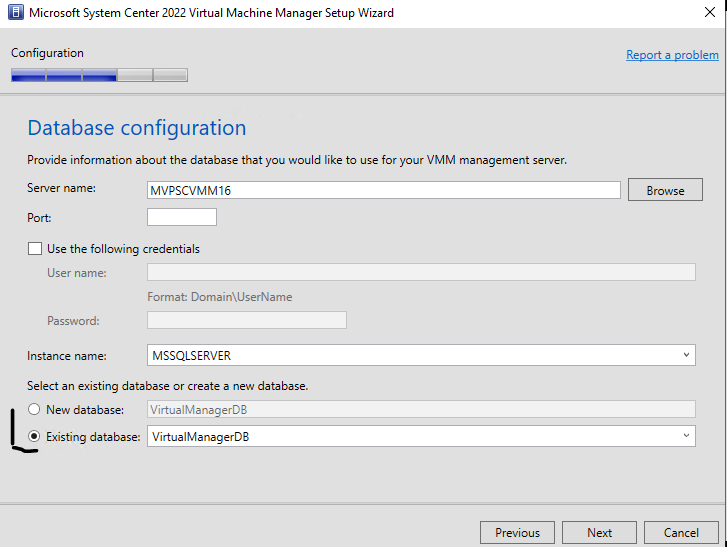
As my VMM server was based on windows server 2016 see the netbios name, I upgraded the server to Windows server 2022 and with the SQL server 2019.
When selecting the Database make sure you use the correct name, If you don’t know the name you can see the name in de SQL server, the wrong Database name gives you the above error.
With the correct Database name.
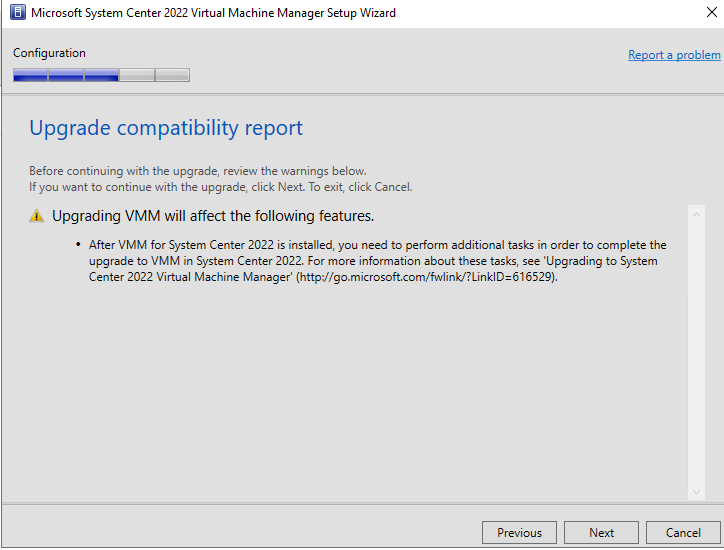
The next step is upgrade the Database and install VMM
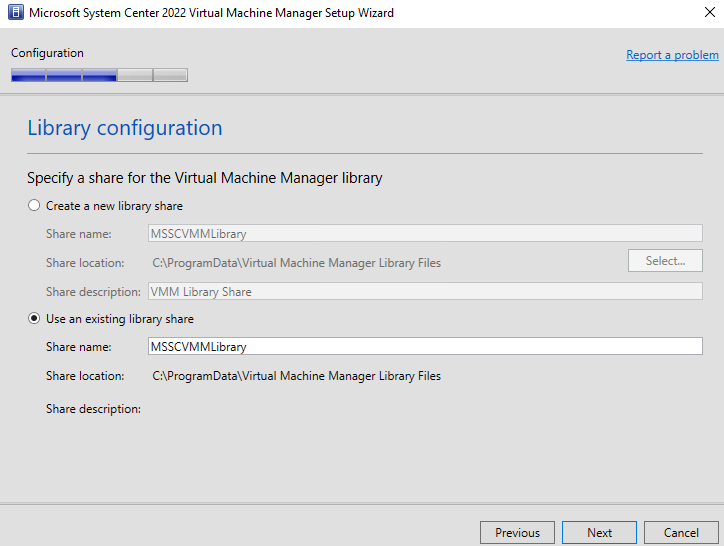
make sure you use the same library name as before.
make sure you take the upgrade steps that are needed in the article when needed.
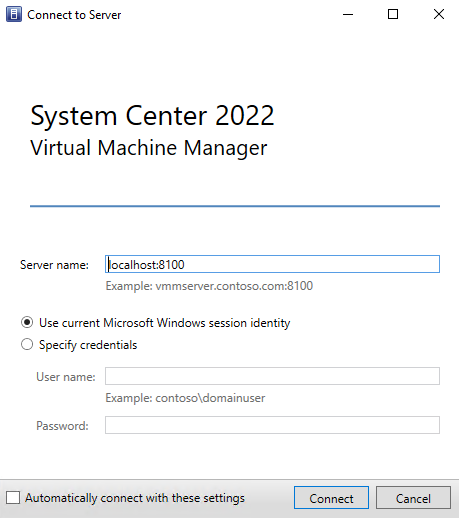
Now that the VMM server is up and running we can use VMM again and the Database and the configuration is as before.
Azure Backup can’t backup the Azure firewall directly additional steps need to be done before you can backup the Firewall rules. If you create all the rules with PowerShell or an ARM / bicep template then it is easy to add all the rules again, but often in time manual rules are changed or added. There for a good backup is needed of the rules to make sure the latest setup is been backuped.
Azure Firewall is a managed stateful network security service
Organizations can leverage Premium stock-keeping unit (SKU) features like IDPS and TLS inspection to prevent malware and viruses from spreading across networks in both lateral and horizontal directions. To meet the increased performance demands of IDPS and TLS inspection, Azure Firewall Premium uses a more powerful virtual machine SKU. Like the Standard SKU, the Premium SKU can seamlessly scale up to 30 Gbps and integrate with availability zones to support the service level agreement (SLA) of 99.99 percent. The Premium SKU complies with Payment Card Industry Data Security Standard (PCI DSS) environment needs.
A setup in my testlab with some rules and keep in mind the current runbook works only if the Firewall , policys, and the storage account is in the same resource group. In this blog post I may use different naming across the screenshots, it is the method that you need and the things that can go wrong.
Requirements
Automation account
Storage Account
Runbook
Overview of my demo lab empty shell with rules.
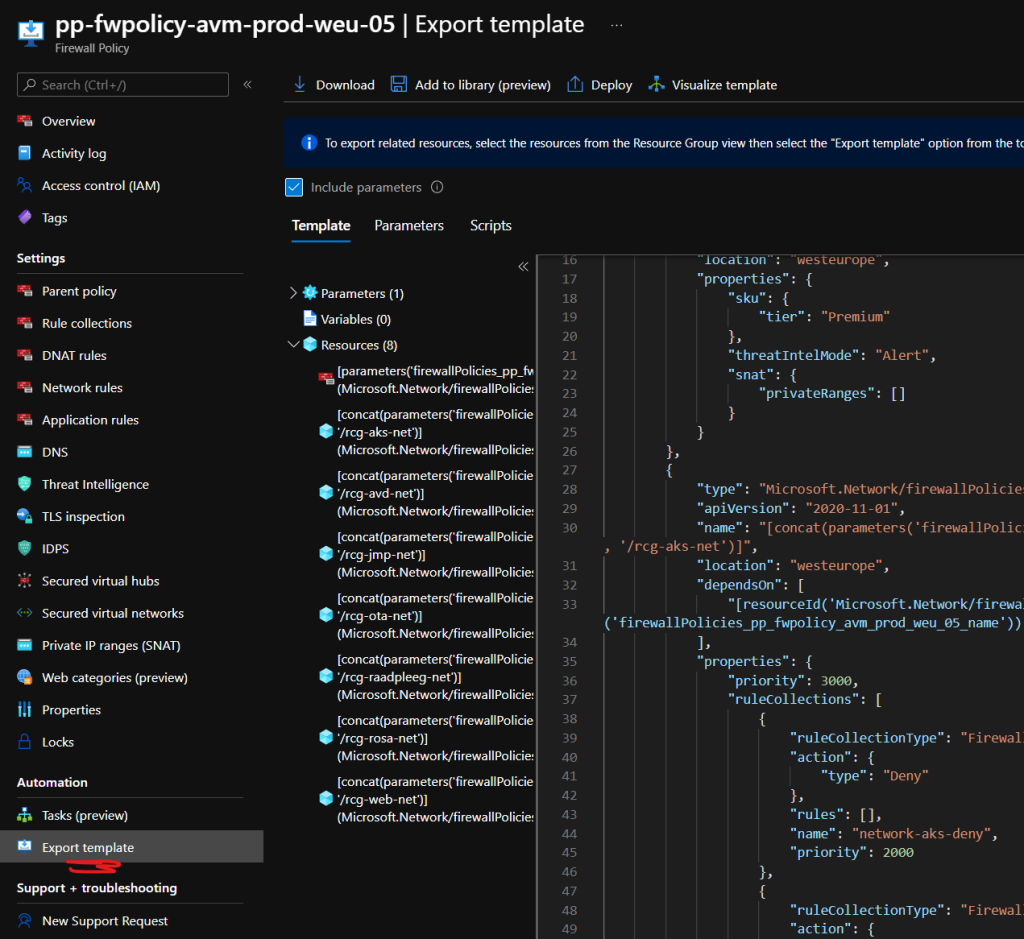
When you are in need to get quickly all the firewall rules and settings you can export the template in the policy manager. as below on my policy’s for the Azure Virtual Machines
Manual is the quick and easy when we want to do this automatically we need an automation account and some runbook that will create a full backup on a storage account, and the storage account can be backup-ed with Azure backup
First we need to setup an Automation Account
Now that the Automation Account is created we can configure it to our needs.
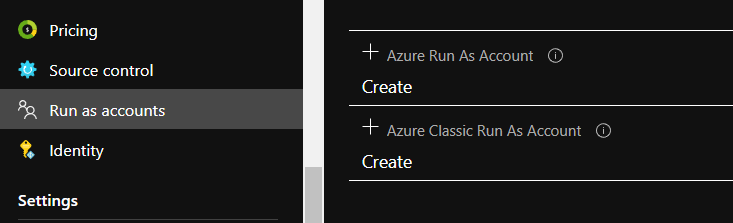
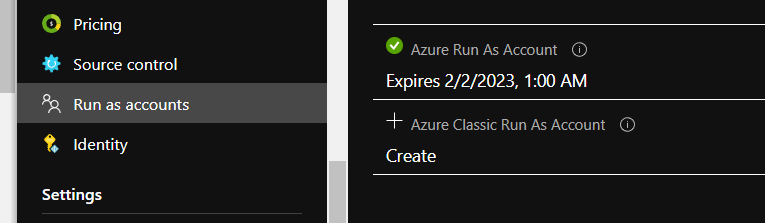
Go to the Automation account and in the Settings blade, under Account settings, create a “Run As” account. This provide the service principal access that will be used to auto-login.
adding the run-as account
This provide the service principal access that will be used to auto-login into the runbook.
The runbook is a PowerShell module and we need to confirm that we have access to network and resources modules. It is important to check if the AZ modules are there else the PowerShell script won’t run. But all you need is already available
The modules that we need are Az.Account, Az.Network, Az.Resources
As you can see all the Az modules are there with the +model from the menu you can add your own modules that you may need.
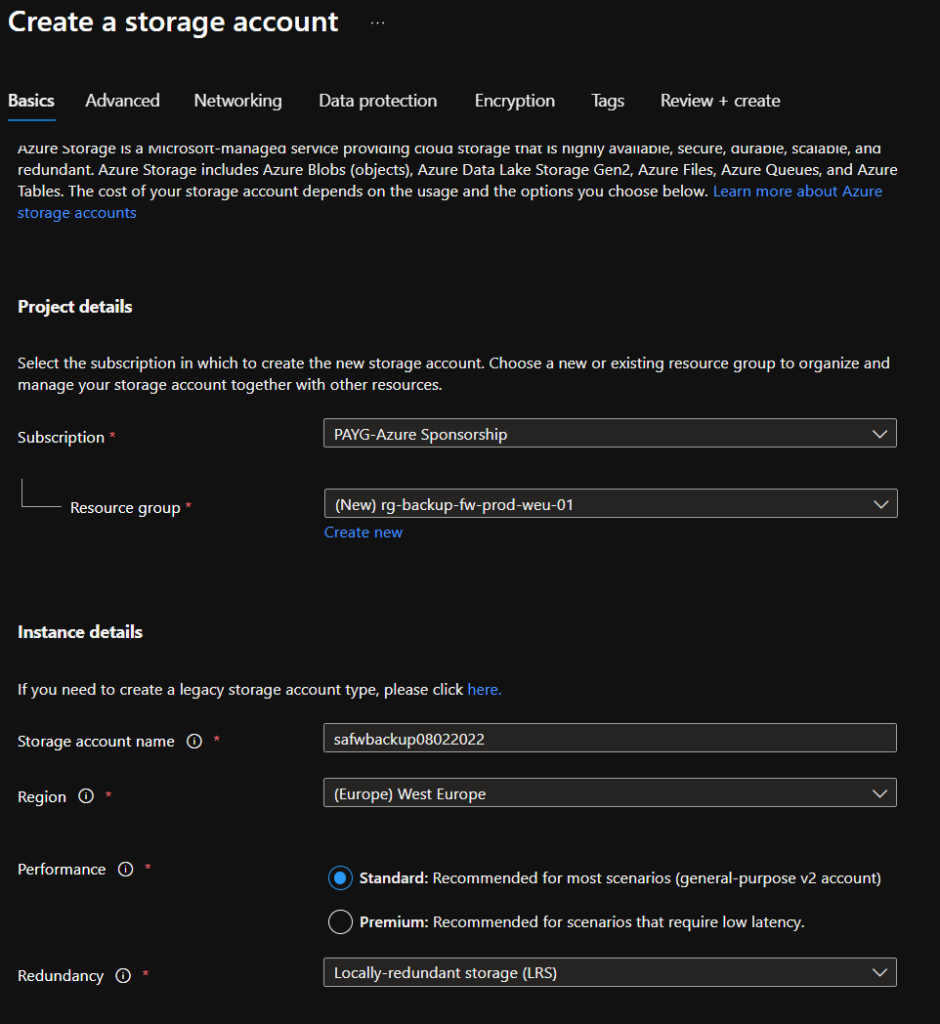
When running the PowerShell script it needs a storage location, A storage account will be used as storage, keep in mind that the storage account needs to be globally unique It can be also on a storage account that you already have for backup or management then that account can be used.
Create a blob storage account.
This can be done with PowerShell or manual
#Create new RG for the firewall backup
$location=”west europe”
$ResourceGroupName=”name”
#Create new RG for the firewall backup New-AzResourceGroup -Name $ResourceGroupName -Location $Location
#Create new Storage account for the firewall backup New-AzStorageAccount -ResourceGroupName $ResourceGroupName -Name $saname -Location $location -SkuName Standard_LRS -Kind BlobStorage
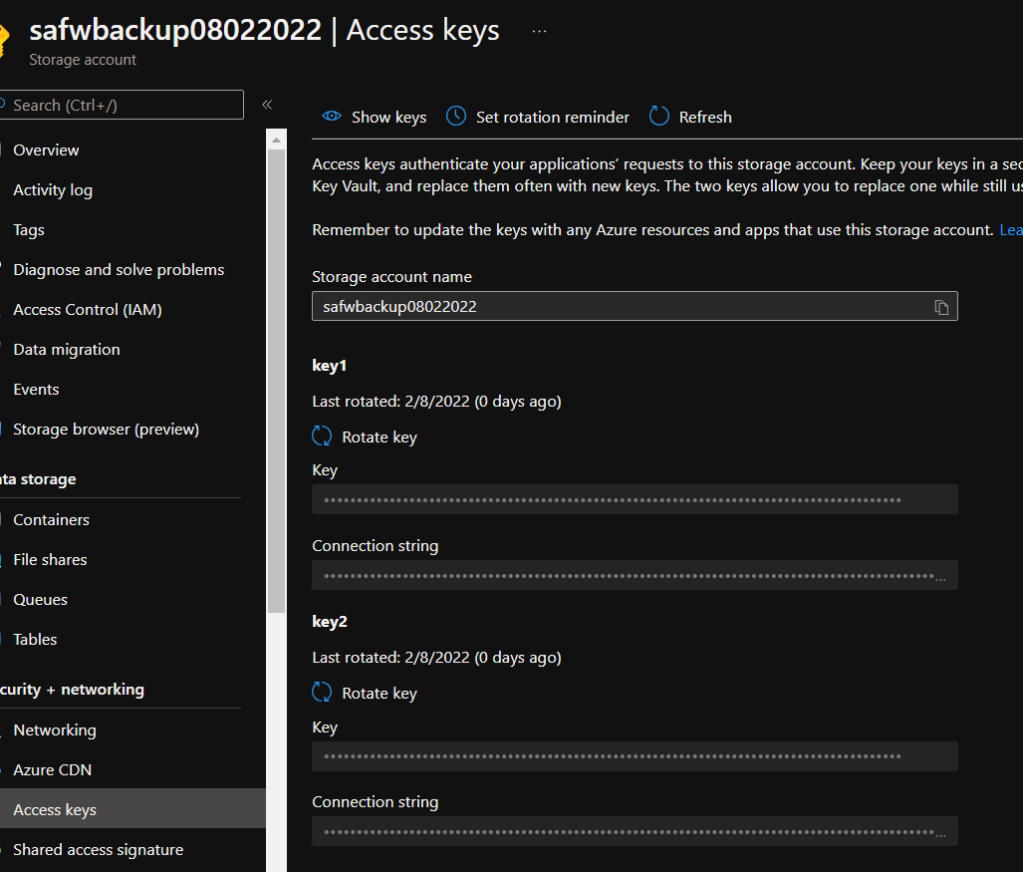
Now we save the account name and storagekey and we create a blobcontainer
Press on show keys to make the key visible
Now that the blob is created we create a folder in the blob, you can also do this in the runbook
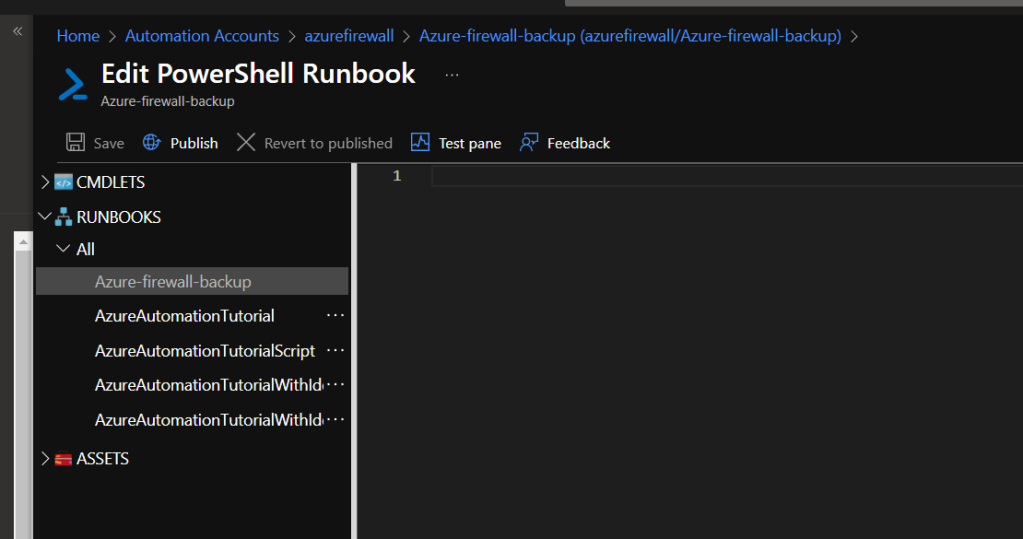
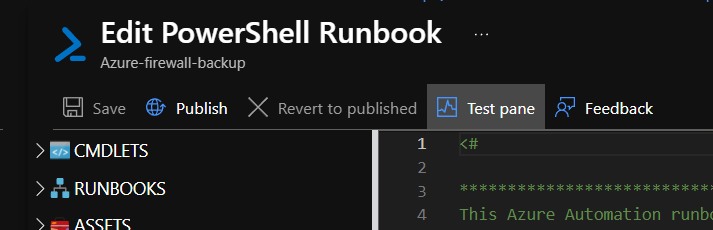
Now that the Storage account is created we go back to our automation account created earlier and create a runbook, this runbook is used for backup all the firewall rules to the storage account.
create a runbook
just give it a name and choose powershell 5
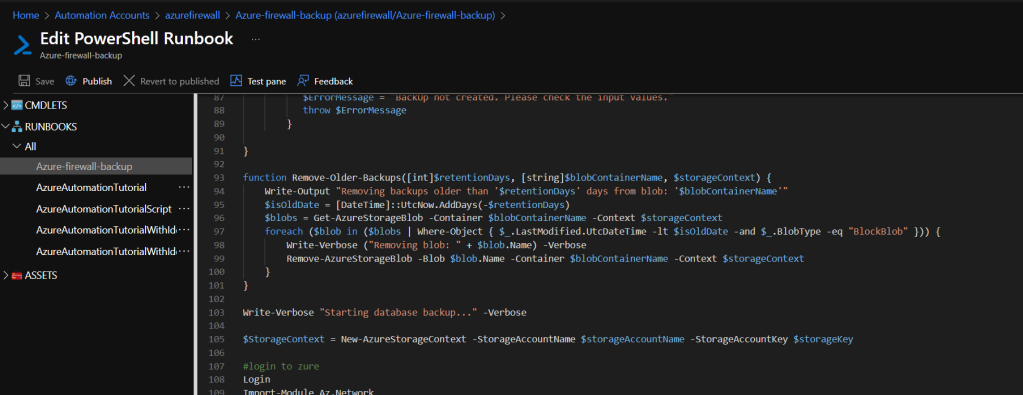
We are using the Runbook that is on the github page
Here we use the created resource group and storage account that we have created for this. you can also make this fixed in the runbook but this is better and also very handy if you want to backup more firewall policy’s
In my case I played to much, if if the folder already exist you will see an error in the test. Also I like to show what kind of errors you could get.
Starting database backup...
Logging in to Azure...
Creating 'firewallbackup' blob container space for storage...
Container 'firewallbackup' already exists
Starting Azure Firewall current configuration export in json...
Starting database backup...
Logging in to Azure...
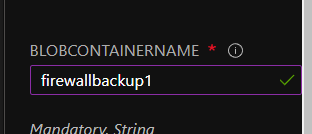
Creating 'firewallbackup1' blob container space for storage...
CloudBlobContainer : Microsoft.WindowsAzure.Storage.Blob.CloudBlobContainer
Permission : Microsoft.WindowsAzure.Storage.Blob.BlobContainerPermissions
PublicAccess : Off
LastModified : 2/8/2022 11:33:12 AM +00:00
ContinuationToken :
Context : Microsoft.WindowsAzure.Commands.Common.Storage.AzureStorageContext
Name : firewallbackup1
Container 'firewallbackup1' created
Starting Azure Firewall current configuration export in json...
Second error that could be there
Failed The running command stopped because the preference variable “ErrorActionPreference” or common parameter is set to Stop: The remote server returned an error: (403) Forbidden. HTTP Status Code: 403 – HTTP Error Message: Server failed to authenticate the request. Make sure the value of Authorization header is formed correctly including the signature.
you probably need to change the storage key that is used, or change the access to that storage account .
But when it all run’s
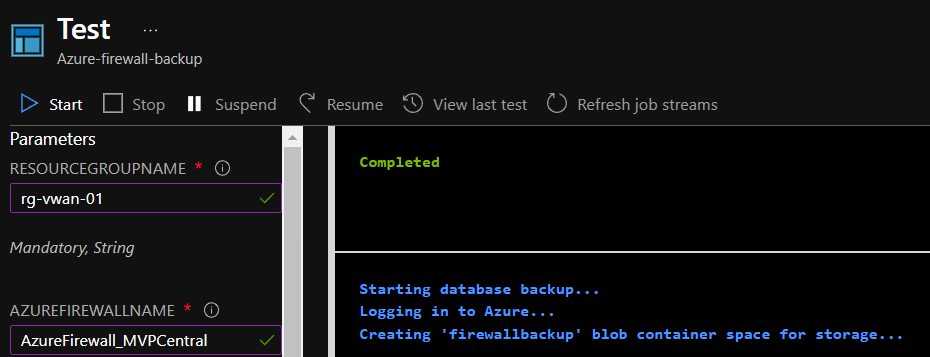
Starting database backup...
Logging in to Azure...
Creating 'firewallbackup' blob container space for storage...

CloudBlobContainer : Microsoft.WindowsAzure.Storage.Blob.CloudBlobContainer
Permission         : Microsoft.WindowsAzure.Storage.Blob.BlobContainerPermissions
PublicAccess       : Off
LastModified       : 2/8/2022 1:05:04 PM +00:00
ContinuationToken  :
Context            : Microsoft.WindowsAzure.Commands.Common.Storage.AzureStorageContext
Name               : firewallbackup
Container 'firewallbackup' created
Starting Azure Firewall current configuration export in json...

Path
----
C:\Users\Client\Temp\AzureFirewall_MVPCentral202202081305.json
Submitting request to dump Azure Firewall configuration
Removing backups older than '7' days from blob: 'firewallbackup'
Azure Firewall current configuration back up completed.
Now that the testing is complete and working we can publish the runbook
Remember if you don’t publish the runbook it won’t work.
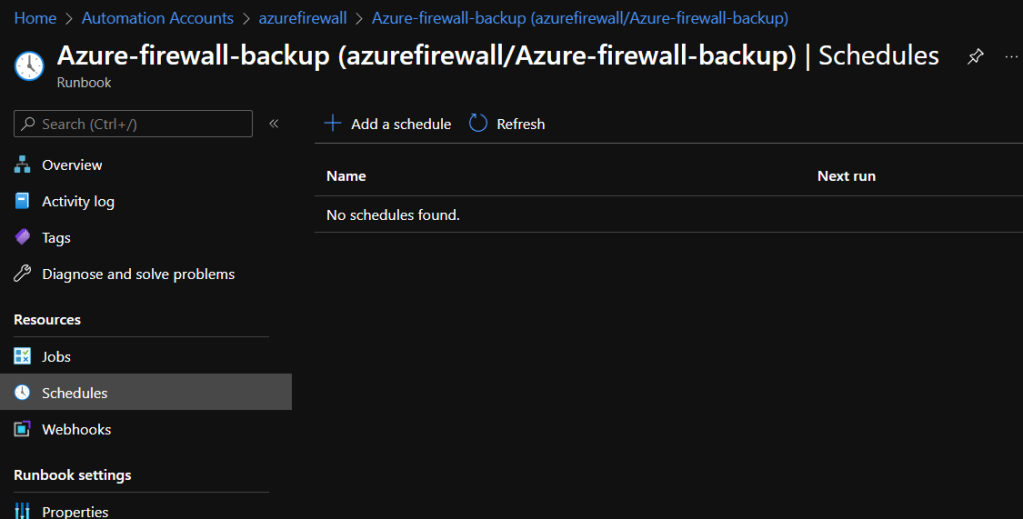
As you run the test runbook it will keep asking would you like to save etc when you want to switch to the schedule blade. just say no save. Our final step is to schedule the backup of the firewall
Create the schedule and the retention time
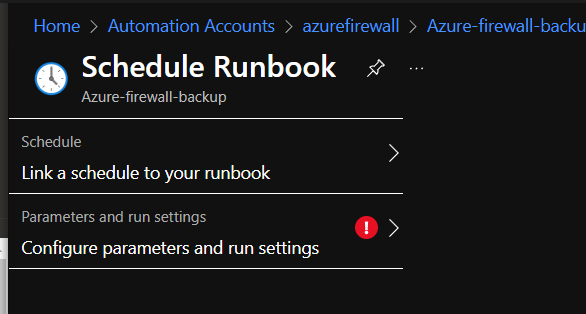
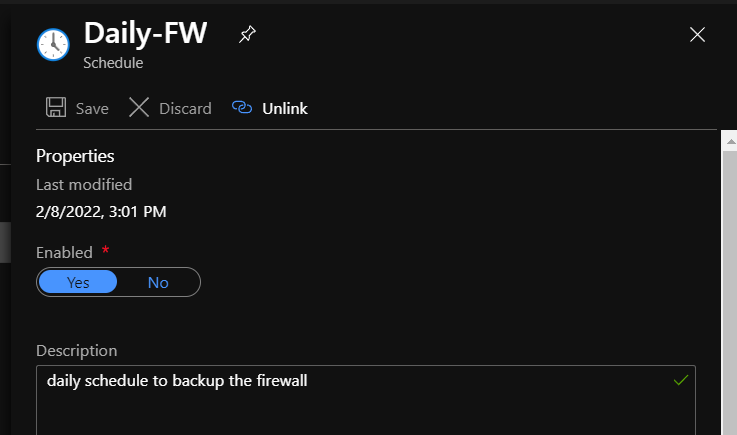
We create a new schedule
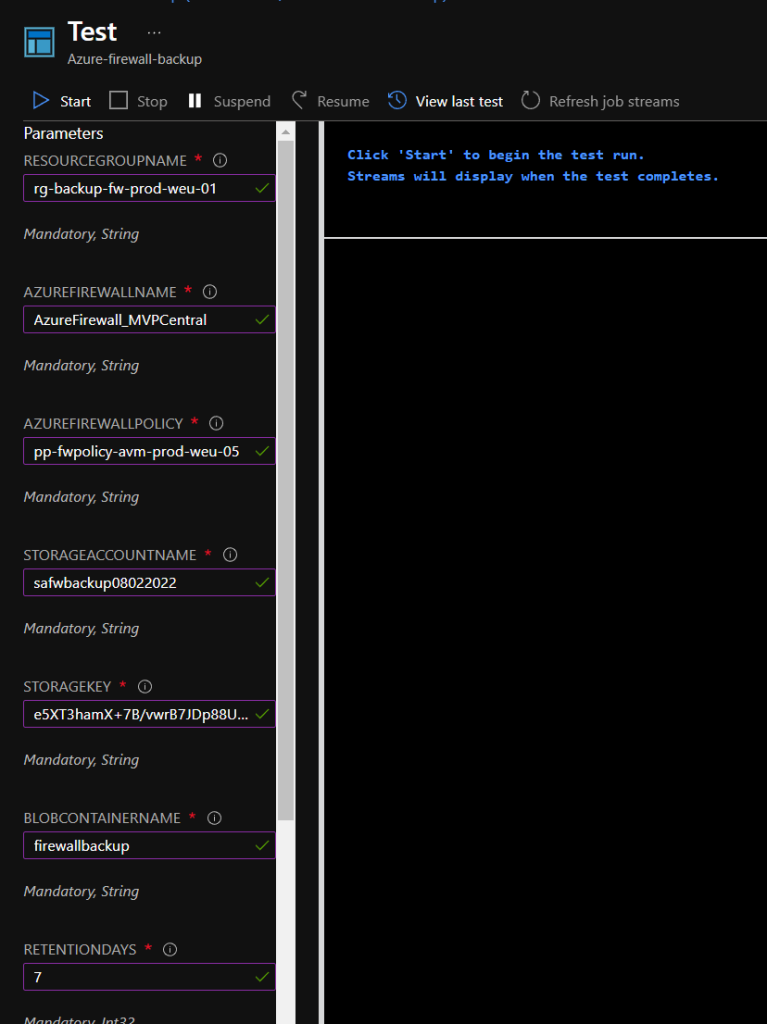
Noe we need to fill in all the parameters just as in the test
ok
if you want to turn this off just click on the line on
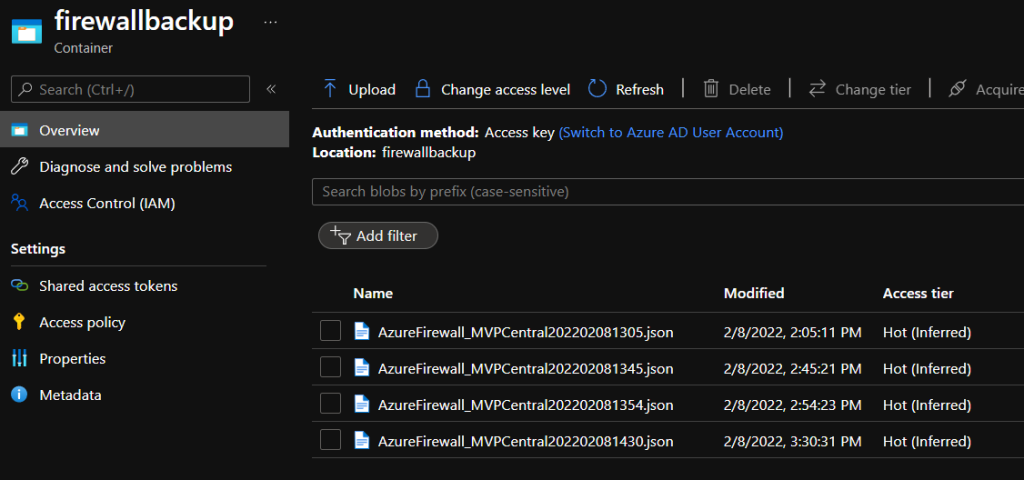
Looking into the storage blob we see all the json files
With this json file you can redeploy the firewall rules or use it for a new deployment with a different name.